If you’re wondering whether daylilies spread, you’re not alone. These vibrant plants are known for their ability to thrive and bursts of color in any garden. However, they can sometimes take over a space faster than you’d expect due to their unique growth habits.
The good news is that with a little knowledge, you can manage their growth and still enjoy the beautiful blooms. Daylilies spread through underground rhizomes and, on occasion, seeds. Some varieties tend to spread faster than others, but with proper care, they can be controlled.
If you want to maintain a tidy garden while letting these stunning plants grow, it’s important to understand their spreading nature. You can easily manage them by keeping an eye on their growth and uncovering the best ways to control their spread while still enjoying their beauty.
Key Points
| #- | Topic | Key Points |
|---|---|---|
| 1- | Spreading | Spread via rhizomes (quick) and seeds (slower). |
| 2- | Growth Speed | Double in size in 2–3 years. |
| 3- | Control | Use mulch, divide every 3–5 years, plant in containers, or use barriers. |
| 4- | Invasiveness | Wild types spread aggressively; hybrids are easier to manage. |
| 5- | Best Conditions | Full sun, well-drained soil, pH 6.2–6.8, weekly watering. |
| 6- | Propagation | Rhizomes preferred; seeds take longer. |
| 7- | Common Issues | Pests (slugs, thrips), diseases (rust, leaf streak). |
| 8- | Dividing Time | Spring or late summer/fall; summer possible with care. |
| 9- | Winter Care | Mulch roots, cut back leaves in fall. |
| 10- | Maintenance | Deadhead flowers, remove stems post-bloom, divide to prevent overcrowding. |
| 11- | Environmental Benefits | Prevent erosion, suppress weeds. |
Do Daylilies Spread? (All the Details)
Daylilies spread naturally through their underground roots, which are called rhizomes. These roots grow outward, helping the plant produce new plants that can grow nearby. Some varieties of daylilies will grow quickly and fill large areas, while others spread more slowly.
This happens as the rhizomes spread through the soil, expanding the plant’s reach. Although they primarily spread through their rhizomes, they can also reproduce via seeds, though this method is less common and takes longer to establish new plants.
If you are growing daylilies, you’ll notice that they tend to fill up spaces gradually, especially when they grow slowly. Over time, the roots will continue to spread, creating new plants that grow nearby.
While some varieties may grow quickly and cover larger areas faster, others are much more subtle in their growth. Keep in mind that although seeds do play a role, the spread of daylilies through rhizomes is far more prominent and efficient in the garden.
How Do Daylilies Spread Naturally?

Daylilies are incredible plants that naturally spread in two ways, making them a versatile and favorite choice for many gardeners. Their rhizomes, which are underground roots, stretch from the main plant, creating shoots and forming clumps that expand every year.
This is their primary method of taking up space in a garden, especially when they grow in sandy, loamy, or even slightly clay-like soil. Their natural adaptability ensures they thrive with enough sunlight and water, making them hardy and low-maintenance.
Daylilies also spread through seeds, although this process happens more slowly. When the flowers are pollinated, they produce seed pods that ripen and release seeds, which take years to mature and bloom into full-grown plants.
Some varieties are more aggressive, quickly covering large areas, while others grow more restrained, depending on the behavior of the variety. If left unchecked, they can form dense mats that suppress weeds but might crowd out other plants, requiring regular maintenance like dividing clumps to maintain a balance that suits the garden’s needs.
What Is the Difference Between Daylily Varieties in Terms of Spreading?
Daylily varieties can differ greatly in how they spread, with each type showcasing unique traits. Wild ditch lilies are known for their fast, aggressive growth. They quickly cover large areas, thrive in tough conditions, and are excellent for filling spaces, though their rapid spread can be challenging to control.
On the other hand, hybrid varieties, which are bred for specific colors and flower shapes, tend to spread more slowly. These are particularly popular in gardens because they are easier to manage and offer beautiful flowers without causing much worry.
Some types, like reblooming daylilies, produce flowers multiple times a season, but their spreading speed largely depends on their rhizomes. For a good balance of beauty and manageability, compact or slow-spreading varieties are ideal.
They work well in small gardens, staying in tighter clumps and spreading less widely. Choosing the right type is essential to enjoy daylilies without letting them take over. Understanding how each variety behaves helps you plan better, keeping your garden looking its best.
Common Problems with Daylilies (and How to Solve Them)

Daylilies can face a range of issues, including pests like slugs, snails, and spider mites. These pests can damage new shoots and cause yellow leaves, brown spots, and even webbing. To manage them, start by removing leaf litter around the plant to prevent the pests.
For spider mites, spraying insecticidal soap or using a garden hose to wash them off can help. Another pest, thrips, causes streaking on buds and deforms petals. You can treat them with a systemic insecticide. If deer are a problem, try using a deer repellent to keep them away.
Diseases like daylily rust appear as orange-brown spots on the foliage. Keep the leaves dry and avoid using sprinklers at night to prevent this. Leaf streak, caused by the fungus Aureobasidium microstictum, can also harm your plants.
Another concern is the root-knot nematode, which weakens the vigor of the plant and causes a decline. Soft rot, a bacterial rot, affects the base of flowers and rhizomes. If you notice swollen flower buds or distorted flowers, especially on early-flowering varieties, you should remove them and throw away the affected parts.
See Also: Lilies Slow to Break Ground? Here’s Why and How to Fix It!
Can Daylilies Become Invasive?
Daylilies, especially the wild varieties, are known for their adaptability and rapid growth, which allow them to spread into areas where they might not be wanted. They can easily thrive in a wide range of conditions, including poor soil, full sun, and partial shade, helping them quickly establish themselves.
Their underground rhizomes are incredibly hardy—even if you dig them out, leaving a small piece behind can lead to a new plant. This resilience makes them difficult to remove, and they can spread along fences, roadsides, and even into neighboring yards.
In natural settings, daylilies may outcompete native plants, which can harm local ecosystems and impact wildlife like bees and butterflies. While their beautiful blooms add charm to landscapes, they lack the same environmental benefits as some native species.
Regular care, such as dividing clumps every few years, and using physical barriers can help in preventing their spread. Despite their challenges, their ability to assist in erosion control and covering bare spots makes them useful for large gardens.
How to Control the Spread of Daylilies in Your Garden
When dealing with daylilies that may be spreading too fast in your garden, there are several methods to regain control. Start by using a lawn mower or a weed whacker to mow the plants down.
Then, cover the area with a thick layer of mulch (at least 6 inches) to prevent further growth. If you notice any green growth, you should reapply mulch and repeat the process until the plants are dead, which can take up to a year.
Another option is to use a systemic weed killer. Apply it on a hot day and wait up to two weeks to see results. If any healthy daylilies remain, reapply the treatment. Keep in mind that this method may kill other plants, so use it as a last resort.
If you want to be more controlled, consider planting your daylilies in containers with well-draining soil. Make sure they get full sun to thrive. During winter, you can overwinter the containers in a shed or cover the soil with mulch to protect them. In some areas, daylilies might be considered invasive, so you may want to avoid planting them altogether.
How Fast Do Daylilies Spread?
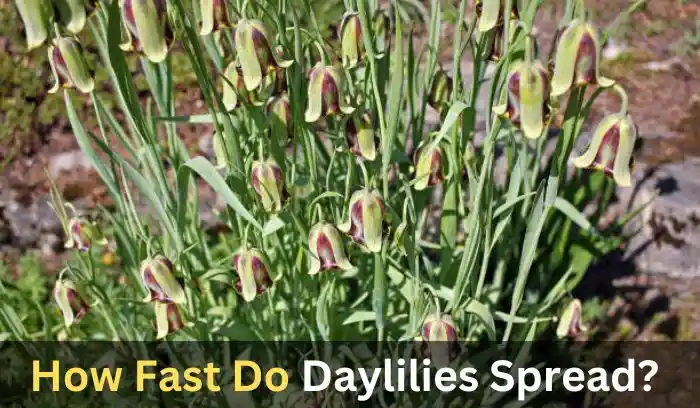
Daylilies can spread noticeably within one to two years. Under ideal conditions, they have the ability to double in size in as little as two to three years. The spreading speed of daylilies depends on several factors, such as sunlight, soil quality, water, and the type of daylily planted.
If you’re growing them in a spot with plenty of sunlight and good soil, you’ll see them spread faster than in less favorable conditions.
In my own experience, I’ve seen how quickly daylilies can cover a space when the conditions are just right. It’s amazing how much they can grow and spread in just a few years, making them a great option for filling empty spots or adding beauty to your garden.
Sunlight: Do Daylilies Need Full Sun?
Daylilies thrive best when they get plenty of sunlight. If you plant them in sunny spots with at least six hours of direct sunlight each day, their rhizomes will develop and grow quickly, allowing the plants to expand into larger clumps. They can even double in size within two years or three years under these ideal light conditions. If you want rapid growth, full sun is the way to go.
However, daylilies are tough plants and can also survive in less-than-ideal light. In partial shade, they still grow, but their growth will be slower, and the flowers may not be as abundant. Despite this, their adaptability makes them a great option for various parts of your garden, even if some areas get less sunlight. For faster results, though, plant them in sunny spots for the best growth and blooming.
Soil Quality and Its Role in Spreading Speed
Daylilies are adaptable to various soil types, but they thrive best in rich, well-draining soil. This type of soil promotes faster spreading since the rhizomes can grow freely, encountering minimal resistance.
If the soil is loose and packed with essential nutrients, daylilies can produce new shoots more quickly. To maintain this growth, regularly adding compost or a balanced fertilizer ensures that the plants have everything they need for healthy development. Proper soil care accelerates their spreading, allowing them to reach their full potential.
Do Daylilies Spread by Seed? (Know the Answer)
Daylilies are beautiful plants that can indeed spread by seed, but this method is less common compared to rhizomes, which are more reliable and efficient for growth. When flowers of daylilies are pollinated, seeds begin to form.
However, growth from seeds takes significantly longer—sometimes, it can take years to develop into new plants. The process is slower, making it a less dependable option than rhizomes, which grow faster and are generally easier to manage.
From my personal experience, I’ve found that while daylilies can indeed spread by seed, it’s more common to see their rhizomes grow and thrive. The new plants that emerge from seeds require more patience and care, as the growth is a gradual process that can take days and even years to fully establish. However, rhizomes tend to offer a quicker and more consistent way of getting new plants from the original ones.
How Seeds Form and Spread
Daylilies start their seed journey when flowers are pollinated. Over time, the seed pods begin to mature and eventually become ripe. Once they’re ready, these pods split open, releasing the seeds.
These seeds may fall to the ground or be carried away by wind or even animals. Unlike rhizomes, which produce identical plants, seeds from daylilies can grow into unique plants with varying colors and shapes.
This happens because many daylilies are hybrids, and the seeds combine different traits from both parent plants. The unpredictability of this process makes it quite exciting for gardeners who enjoy seeing what their growing plants might look like.
Why Rhizomes Are Preferred Over Seeds
Many gardeners prefer rhizomes over seeds when growing daylilies. The reason for this is that rhizomes offer faster and more efficient growth, with plants maturing in just one or two years. This is much quicker than growing from seeds, which can take several years to grow and flower. When time is of the essence, dividing and planting rhizomes is the preferred method for quick results.
While seeds are useful for creating new varieties and experimenting with unique flowers, the process is slower and less predictable. For those who enjoy the challenge of experimenting and want to see how different traits develop, seeds can be a rewarding choice. However, for gardeners seeking consistent and reliable growth, rhizomes remain the preferred option.
See Also: Why Are Seeds Popping Out of the Soil When Worms Fertilize?
Can You Split Daylilies in the Summer?

Splitting daylilies in the summer is possible, but it’s not the easiest time. Early spring or late fall are often better because the weather is cooler and the plants aren’t blooming. However, if you need to split them during the summer, it’s important to give them extra care to help them recover and grow successfully.
Start by digging up the roots carefully using a spade, and separate the clumps into smaller sections. Replant them immediately in well-prepared soil to minimize stress and give them a better chance to adjust.
After splitting, it’s normal for the plants to appear stressed or even show signs of wilting for a few days. To help them adapt to their new environment, you can reduce water loss by trimming the foliage by about one-third.
This makes it easier for the roots to establish without being overwhelmed by too much top growth. For the best results, try to do this on a cloudy evening when the temperatures are cooler, as this will help the plants grow and recover beautifully. With careful handling and attention, your daylilies will thrive after being split in the summer.
Do Daylilies Come Back Every Year?
Daylilies are perennials, which means they come back every year. Once planted, they begin to grow and bloom during the growing season, but as fall arrives, they die back. However, in spring, they return with fresh green leaves and flowers, making them a reliable choice for any garden.
To ensure they come back strong, proper maintenance is key. In fall, make sure to remove dead leaves to tidy up the garden and prevent any pests or diseases. Adding mulch in winter helps protect the roots from freezing temperatures, especially in colder regions.
When to Divide Daylilies in Zone 7?
Best Time to Divide Daylilies in Zone 7
In Zone 7, the best time to divide daylilies is usually during early spring or late summer into early fall. These seasons offer mild weather, allowing the plants to recover quickly after being divided.
Timing is crucial to give the plants time to establish themselves before they face extreme conditions like the summer heat or winter cold. In early spring, the soil is warm enough to encourage root growth, and new leaves begin to appear, making it a great time to divide. Dividing daylilies at this stage minimizes stress, and the plants often produce flowers during the same growing season.
Alternatively, late summer to early fall is also a good time to divide, allowing the plants several weeks to settle before they go dormant for the winter. It’s best to avoid dividing daylilies during the middle of summer when temperatures are high. If you must, make sure to water the plants thoroughly and provide some shade to help them adjust.
Keep an eye out for signs that your daylilies need dividing, such as overcrowded clumps, fewer blooms, or weak growth. Dividing them every three to five years ensures they stay healthy, thrive, and continue to produce beautiful flowers for many years.
SaaAlso: When to Seed Lemongrass in Zone 9a? A Complete Guide
How Long Do Daylilies Bloom?

Blooming Period of Daylilies
Daylilies typically bloom for about one to five weeks, depending on the variety and growing conditions. Each flower lasts for only one day, but the plant continues to produce buds that open over time, giving the appearance of continuous flowering.
This bloom period can stretch out, lasting for several weeks as the buds open one by one. Most daylilies begin blooming in late spring or early summer and continue until mid-summer. However, some varieties, known as reblooming daylilies, can bloom multiple times during the growing season, offering a second wave or even a third wave of flowers.
The blooming time can vary among different varieties. For instance, early-blooming daylilies typically start flowering in May, while mid-season and late-blooming varieties may continue to flower until July or August. With proper care, you can enjoy their vibrant display for a long period, making them a wonderful addition to any garden.
When Do Daylilies Bloom?
Daylilies are known for their stunning blooms that typically appear in late spring and continue into mid-summer.
The precise timing may differ based on the specific variety. For example, early blooming types will start flowering around late May or early June, marking the start of the blooming season. On the other hand, mid-season varieties tend to bloom in late June, while late-blooming types can extend the bloom period all the way into July and August.
If you want to enjoy flowers for a longer period, it’s ideal to plant a mix of these different types. Interestingly, there are also reblooming daylilies, a special exception in the world of daylilies, that bloom multiple times during the same season.
However, the bloom time of these beautiful plants can also depend on the climate. In warmer regions, you may see them bloom earlier, while in cooler areas, blooms tend to start later but last longer, as they aren’t stressed by high temperatures.
Environmental Factors That Affect Daylily Growth
Daylilies thrive best in full sun, though they can tolerate some shade. Darker varieties grow better in partial shade, while lighter varieties need full sun to show off their vibrant colors.
They prefer moist, well-drained soil rich in organic matter with a pH range between 6.2–6.8. Proper water availability plays a key role in the length of their vegetative growth period. When planting in areas with hot summers, daylilies should ideally be planted in fall or spring for optimal growth.
For the best results, it’s crucial to use a slow-release fertilizer with an N:P:K ratio of 3:1:2 before they bloom. Pay attention to planting depth, as planting too deeply can reduce flowering and lead to decline in the plant’s health. Competition from large trees with shallow roots may hinder growth due to light deprivation. Heavy shade can also cause daylilies to grow thin and spindly, leading to poor flowering.
See Also: Is It Illegal to Pick Spanish Moss in Florida? Everything You Need to Know
How to Care for Daylilies After Dividing
Watering and Fertilizing Daylilies
After dividing daylilies, it’s essential to water them regularly to promote healthy growth. Water at the base of the plants, ensuring that the root systems are soaked deeply, reaching about 8-10 inches into the soil. During the first year after planting, I recommend watering on a weekly basis and increasing frequency during dry spells.
After about two weeks from transplanting, it’s also a good time to apply a balanced fertilizer to give them a nutrient boost. A slow-release formula is ideal in the spring, and don’t forget to add some compost around the plants to support their growth.
Mulching, Weeding, and Trimming
Adding a layer of mulch around your daylilies will help insulate them through the winter and keep the soil temperature stable. As the weather cools, mulching also helps prevent weeds, which can compete for sunlight and soil nutrients.
I always find that hand pulling or hoeing weeds, along with mulching, works wonders for keeping insect pests at bay. You should also trim off old foliage, removing dead or dying vegetation during late fall, and cut back the daylilies to about two inches above the ground to help them thrive in the next growing season.
FAQs
Daylilies are hardy, pest-resistant, and quick to multiply, making them ideal for any garden or landscape. These perennials produce blooms that last over a long period, thriving as specimen plants, ground covers, or massed to stabilize slopes.
For compact spaces, dwarf forms are good container subjects, offering beauty and versatility with minimal care.
Daylilies are tough plants that thrive in areas with six or more hours of full sun per day. They are often seen along interstate roadsides, planted in masses for their resilience and beauty.
For the best results, avoid constantly waterlogged soil, as it can damage their roots. Their adaptability makes them perfect for gardens and landscapes alike.
Each daylily flower lasts one day, so remove spent flowers to keep the plants looking their best. Be careful not to disturb nearby buds while you snap them off.
Once the scape or stem is finished blooming, cut it back to the ground. This keeps the plant neat and saves its energy by preventing seed production.
Spring is a great time to plant daylilies, but it’s important to wait until the danger of a hard frost has passed. This ensures the plants can grow without being damaged by cold weather.
Fall is another good season for planting, but you should try to finish planting about 4-6 weeks before the first frost. This gives the plants time to settle and establish their roots before winter arrives.
Daylilies thrive with a balanced fertilizer containing equal amounts of nitrogen, phosphorus, and potassium, like 10-10-10 or 12-12-12. They especially love nitrogen, which promotes healthy foliage and growth.
Using a fertilizer higher in nitrogen can make your daylilies even happier, ensuring they grow strong and vibrant throughout the season.
Conclusion
Daylilies are truly stunning and hardy plants that can thrive in your garden with very little effort. They spread through underground rhizomes and sometimes seeds, making them an easy choice for anyone looking to add vibrant color and life to their outdoor space. Dividing them every few years helps keep them healthy and prevents overcrowding, ensuring they continue to bloom every year.
With the right varieties, you can enjoy blooms all summer long, no matter the climate. Daylilies are easy to care for and are adaptable to most climates, making them a fantastic option for anyone looking to brighten up their garden with minimal work. Whether you’re a seasoned gardener or just starting out, daylilies offer beauty and ease all year long.