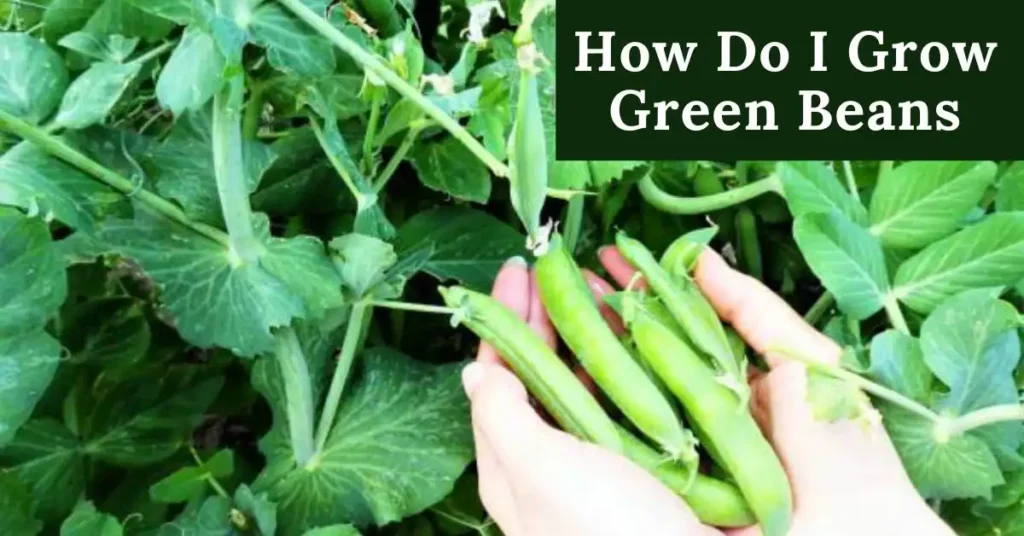
Growing green beans is a simple and rewarding task, whether you call them string beans, snap beans, or even haricot vert. These legumes are not only easy to grow in your garden, but they also provide a delicious and crunchy addition to any meal.
The pod can be eaten whole, making them a favorite snack for both kids and adults. When harvested fresh, the crispness of biting into a raw bean is a delight, but they can also be steamed, blanched, sauteed, or even roasted for a variety of recipes.
Green beans are perfect for soups and stews, and adding a little butter, salt, and pepper can turn them into a simple yet flavorful side dish. If you’re feeling creative, mix them with onions and cream of mushroom soup for a classic casserole.
As you grow your green beans, you’ll likely notice the lack of the fibrous string that older varieties used to have. This is due to modern cultivation, so don’t worry about the seam running down the pod.
Whether you plant yellow, purple, or even multi-color beans, you’ll find they offer a great abundance during the summer, perfect for preserving through canning.
Many gardeners find green beans easy to store and enjoy months after harvest, making them a perfect vegetable to grow year after year. Plus, they’re incredibly versatile: use them fresh or preserved to enjoy their delightful flavor anytime. Don’t forget to have a reference handy to ensure you’re caring for them properly along the way!
When, Where, and How to Plant Green Beans
When planting green beans, it’s important to decide whether you’ll be growing bush beans or pole beans. Bush beans reach a specific height, yield their produce, and subsequently cease growth.
These beans are perfect for planting in rows, spaced about 4-6 inches apart. Pole beans, on the other hand, climb and require a trellis, so if you’re growing these, you’ll need to provide bamboo stakes or some other structure for them to twine around.
Both types should be planted outdoors after the last frost date in spring, when the soil is fertile and well-worked. You should also ensure the soil pH is between slightly acidic and neutral, ideally ranging from 6.0 to 7.0.
Before planting, sow seeds or seedlings about 1 inch deep into the soil. If starting indoors, plant the seeds in a sterile seed-starting mix at a temperature between 60° and 85° Fahrenheit and place them under grow lights to prevent them from getting leggy. After about 5 to 10 days, the seeds will germinate.
A few weeks before transplanting, harden off the seedlings by gradually exposing them to outdoor conditions. Once the soil has reached 70° outdoors, it’s time to transplant.
Be sure to water the plants immediately after planting, and cover the soil with organic mulch to help retain moisture and regulate temperature, especially on cool nights. This also helps prevent pathogens from affecting the plants. In warm climates, you can sow seeds again for a fall crop, planting at least 10 to 12 weeks before the first frost.
Varieties of Green Beans
When it comes to green beans, the most common variety you’ll find is a cultivar of Phaseolus vulgaris, also known as the common bean or French bean. This type of green bean is popular for its mild taste and versatility in many dishes.
However, there’s another interesting type known as the scarlet runner bean, which is a different species called Phaseolus coccineus.
While this bean can also be enjoyed like a typical green bean when picked young, it has the added beauty of red flowers that bloom during the growing season, making it a visually stunning choice for your garden.
Both types of green beans are great additions to your garden or kitchen, offering variety in flavor, texture, and even aesthetic appeal. Whether you’re looking for the classic taste of the common bean or the unique charm of the scarlet runner bean, each type brings something special to the table.
Antigua
If you’re looking for a bush bean variety that’s easy to manage and grows efficiently, Antigua could be a perfect choice. This variety is known for its uniform, 5-inch long, dark green pods that offer a fresh, clean appearance.
The plants grow 18 inches tall in an upright position, making them ideal for smaller garden spaces or raised beds. What makes Antigua even more appealing is its disease resistance, which means fewer worries about plant health as you enjoy your harvest. Antigua beans take only 55 days to mature, making them a fast-growing option for those who want quick results from their garden.
Whether you’re new to growing beans or a seasoned gardener, Antigua offers great ease and reliable performance, producing high-quality beans in a short time. It’s a variety you can trust for both taste and durability in your garden.
Blue Lake Pole
One of the standout varieties of green beans is the Blue Lake Pole. This variety is widely known in the Pacific Northwest, where it thrives and produces sturdy plants that can grow up to 7 feet tall.
The 6-7-inch pods it produces are particularly sought after for canning, making this variety a favorite for gardeners who want to preserve their harvest. Blue Lake Pole plants typically mature in about 75 days, giving a quick turnaround for those eager to enjoy fresh beans.
If you’re looking for something a bit shorter in height, the bush-type Blue Lake offers the same high-quality pods but with a more compact growth habit. This option is great for gardeners who prefer a bush-type plant but still want the excellent canning quality and flavor of the traditional Blue Lake variety.
Borsalino
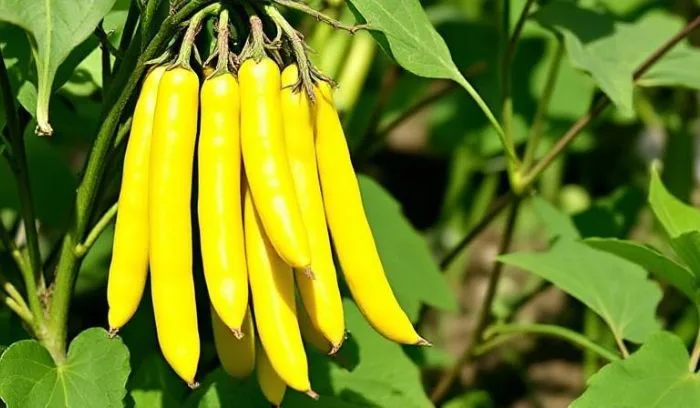
Borsalino is a French bean variety known for its vibrant bright yellow pods that reach their peak flavor when they are between 4 inches and 4 and a half inches long.
This bush-type bean is highly vigorous and productive, making it a great choice for gardeners looking for a reliable harvest. The plants grow up to 20 inches tall, and they have good disease resistance, which makes them easier to maintain in your garden.
One of the best features of Borsalino is its quick growth — it matures in just 60 days, offering a fast turnaround for fresh beans. If you’re looking for a flavorful, easy-to-grow option with vibrant color, Borsalino might be the perfect choice for your garden.
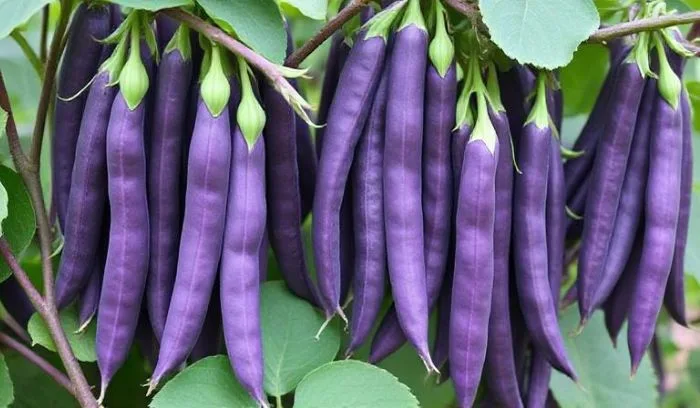
Carminat
One of the standout varieties of green beans is Carminat, a pole bean that offers both beauty and flavor. Known for its slender and purple pods, this variety is particularly special. The pods typically grow to about 8-9 inches long, making them a great addition to any garden or kitchen. While the pods appear purple, they turn green when cooked, offering a slightly sweet taste that’s truly enjoyable. If you’re considering growing them, you’ll appreciate that the plants take around 62 days to mature, making them relatively quick to harvest.
From personal experience, it’s always satisfying to see these beans grow tall and yield such vibrant produce. They’re not just beautiful to look at but delicious to eat as well.
I’ve found that Carminat beans are especially useful in various dishes, whether sautéed, steamed, or tossed in a salad. Their unique color and flavor make them stand out in any recipe.
Harvesting them is easy, and you’ll often be surprised by how many pods each plant produces. All in all, Carminat is a top choice for anyone looking to grow green beans that add a burst of color and taste to their meals.
Celine
Celine is a variety of green beans known for its striking lilac-colored pods. These pods grow to about 5-inch in length and are produced by 20-inch tall bush-type plants. The plants are compact, making them ideal for small garden spaces or containers.
One of the best things about the Celine variety is how quickly it matures, typically within just 55 days, allowing you to enjoy fresh beans in no time. In my experience, Celine beans are perfect for anyone looking for an easy-to-grow, colorful, and productive variety to add to their garden.
These beans not only stand out because of their beautiful color, but they also deliver great flavor in every bite. The pods are tender and perfect for cooking, whether you’re steaming, sautéing, or adding them to your favorite salad.
Having grown Celine myself, I can confidently say it’s a great choice for gardeners who want a quick-growing, low-maintenance variety that doesn’t sacrifice flavor or beauty.
Dragon Tongue
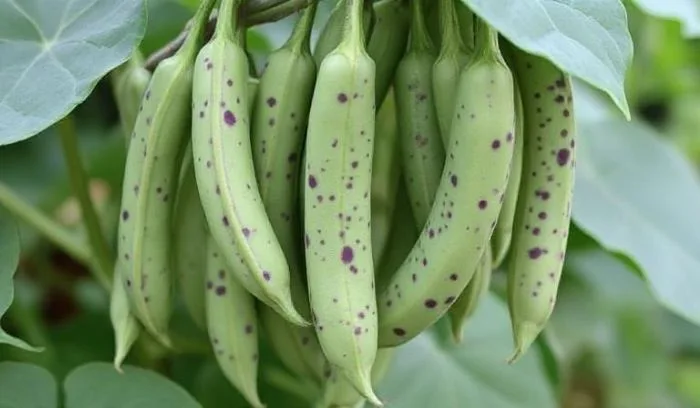
The Dragon Tongue variety is a stunning bush-type bean known for its unique green pods that are speckled with flecks of purple. These pods are versatile in the kitchen, perfect for eating as a snap bean while they’re still young, or letting them mature and pick them when ripe to be shelled for storage or cooking.
The plants are compact, growing about 24-30 inches tall, making them great for smaller spaces. They typically mature in 60 days, so you won’t have to wait long before enjoying these flavorful beans.
Having grown Dragon Tongue myself, I’ve found them to be incredibly rewarding. The pods not only taste great fresh, but they also hold their flavor when cooked.
Whether tossed in a salad, stir-fried, or used in soups, these beans offer a pop of color and a unique taste. Their quick growth and easy-to-harvest nature make them a favorite for both new and experienced gardeners alike.
Kentucky Wonder
The Kentucky Wonder is a beloved heirloom pole bean that has stood the test of time. Known for its impressive plants that can reach heights of 6-8 feet, this variety is perfect for gardeners with a bit of space. The pods are flat, straight, and have a beautiful silvery-green hue.
They grow 6-8 inches long and are known for their tenderness and great flavor when harvested. With a maturity time of around 70 days, these beans are quick to produce, making them a popular choice for those looking to add fresh beans to their meals in no time.
In my own experience, Kentucky Wonder beans are a must-grow for any gardener. Their pods are easy to pick and taste amazing whether cooked fresh or used in different recipes.
They don’t just look stunning in the garden; their quick growth and reliable yield make them one of my favorite varieties to grow each season. Whether you’re new to gardening or a seasoned pro, this variety of bean never disappoints.
Purple Queen Improved
Purple Queen Improved is a beautiful bush-type green bean known for its uniformly straight and vibrant purple 6-inch pods. These beans stand out not only for their striking color but also for their unique feature: the pods turn green when cooked, offering a mild, fresh taste that works well in a variety of dishes.
The plants grow to be about 20-24 inches tall, making them compact and easy to manage in smaller gardens or containers. One of the key benefits of the Purple Queen Improved is that it is cold tolerant, allowing it to thrive even in cooler climates.
In my experience, this variety is an excellent choice for gardeners looking for something hardy and low-maintenance. The quick-growing plants produce a good amount of pods, making them a rewarding addition to your garden. Whether you’re sautéing them, adding them to salads, or steaming them, these beans offer a beautiful splash of color and delicious flavor to any meal.
Velour
The Velour green bean is a disease-resistant bush-type bean that stands out in the garden with its striking deep purple pods. These smooth, round pods are about 5 and a half inches long, making them perfect for fresh eating or cooking.
The plants are compact but sturdy, growing quickly and maturing in just 55 days, so you’ll have a steady supply of beans in no time. This variety is not only visually appealing but also tough, able to withstand various garden challenges thanks to its disease-resistant nature.
Having grown Velour myself, I can say it’s a fantastic choice for anyone looking for an easy-to-grow bean that looks as good as it tastes.
The plants are healthy and thrive in a range of conditions, making them great for both new and experienced gardeners. Whether you’re tossing them in a salad or sautéing them for a side dish, the smooth texture and vibrant color of these beans will add a beautiful touch to any meal.
Wyatt
Wyatt is a fantastic bush-type bean that produces high yields with its uniform plants. The beans have deep emerald green pods, which are tender and grow up to 6 and a half inches in length.
One of the things I love about the Wyatt is its productive nature—it doesn’t require much effort to grow, and the results are always great. These plants are known to mature quickly, typically in 54 days, which makes them a perfect option for gardeners who want a fast harvest.
In my own experience, I’ve found Wyatt beans to be both hardy and reliable. The uniform plants grow consistently, making it easy to maintain rows and ensure a smooth harvest. Whether you’re new to gardening or a seasoned pro, Wyatt beans are a great choice for anyone looking to grow tender pods that are perfect for both fresh eating and cooking.
SEE ALSO: How to Tell if Plums Have Gone Bad: A Guide to Identifying Spoiled Plums
Watering Green Beans
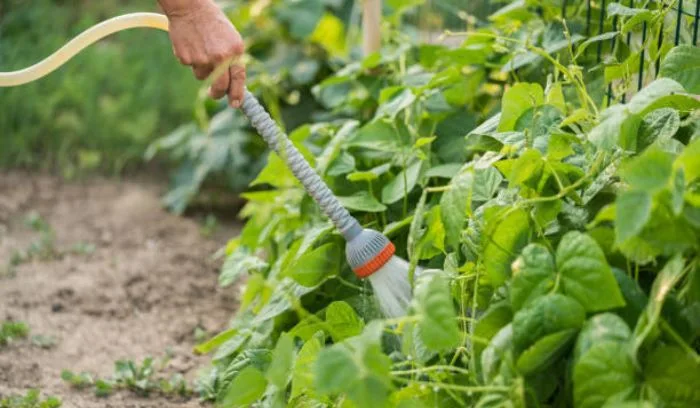
When growing green beans, it’s important to remember that they are shallow rooted plants. This means their watering needs are more focused on regular, consistent moisture rather than deep watering.
On average, they need about an inch of water each week, but during the hottest days of summer, you may need to apply additional water to keep them thriving. If the forecast calls for less than an inch of rain over the course of the week, it’s a good idea to step in and provide extra water to ensure they don’t dry out.
For the best results, using a soaker hose or drip irrigation system placed near the base of the plants can help maintain consistent moisture without wetting the foliage.
I’ve found that automatic timers make watering easier and more efficient, especially during busy weeks. One key thing to remember is to avoid overhead watering—soil splashes can lead to disease, especially when leaves get wet. Instead, water under the foliage to keep your green beans healthy and strong.
How To Grow Green Beans At Home
Growing green beans at home is a rewarding and simple task. To start, select a sunny spot in your garden with good drainage. This ensures the plants get the light they need.
Green bean seeds should be planted directly in the ground, about 1 inch deep, spaced appropriately depending on the variety—for bush beans, space them 2-3 inches apart, and for pole beans, space them 4-6 inches apart.
After planting, water regularly, but avoid overwatering. Providing support for climbing varieties like pole beans is essential, so consider using a trellis or any sturdy climbing structure. Harvest your beans when they are still young and tender, usually within 45-60 days of planting.
Ensure the soil is slightly acidic with a pH around 6.0. Wait until the soil is warm and the last frost has passed before planting outdoors. Beans need at least 6-8 hours of direct sunlight daily for optimal growth.
Germination will occur faster with the right conditions, followed by flowering, and eventually, the beans will be ready for harvest. Just be sure to pick them while they are still crisp to get the best flavor and texture.
How to grow green beans in a raised bed
When planting green beans in a raised bed, the first step is to ensure the soil is rich and well-drained. You can improve this by adding compost to the soil, which will provide the necessary nutrients. Make sure the soil is slightly acidic to help the plants thrive.
Select a sunlit area and sow seeds directly into the ground. These beans prefer plenty of sunlight to grow strong and healthy. It’s also important to water the plants regularly and provide adequate support for climbing varieties using a trellis or stake.
To maintain the health of your plants, add a layer of mulch around them. This helps retain moisture and suppress any unwanted weeds that could compete for nutrients.
The raised bed also helps with drainage, ensuring the roots don’t become waterlogged. Keep an eye on the plants to ensure they are getting enough water and that the soil remains in good condition for healthy growth.
Fertilizing Green Beans

When it comes to fertilizing green beans, these plants are quite special. As legumes, they have a natural ability to work with nitrogen-fixing bacteria in the soil, which helps them produce their own fertilizer. This unique process means you don’t need to over-fertilize them.
Instead, focus on making sure they’re planted in soil that’s rich in nutrients. I always recommend that the soil be amended with plenty of compost before planting, as this gives your green beans the best start.
Unlike many other plants, green beans don’t rely heavily on external fertilizers. Once the soil is properly prepared and amended, they’ll thrive on their own, thanks to the bacteria’s help.
It’s important to keep this in mind because too much fertilizer can actually harm their growth, leading to more leaves than beans. Stick with natural amendments like compost to keep things balanced, and your green beans will do the rest.
SEE ALSO: How To Tell If A Tomato Has Gone Bad – A Beginner’s Guide
Green Bean Pests & Diseases
When growing green beans, staying vigilant about pest and disease issues is crucial. The Mexican bean beetle is a common pest that targets bean plants. It looks similar to the lady beetle but has a pale orange back with black spots.
These beetles lay yellow egg clusters on bean leaves, which hatch into yellow larvae resembling tiny alligators. If you spot them, make sure to check plants regularly and remove the eggs or larvae by hand. You can also use neem oil to help control them, but once they’re well established, they become hard to control organically.
To prevent Mexican bean beetles from damaging your plants, you can use a floating row cover as a physical barrier. However, this method can be tricky on pole beans. Despite being a helpful solution for many, managing these pests requires constant attention, as even the smallest delay can cause significant damage to your crop.
Aphids
One pest that can cause issues for green beans is aphids. These soft-bodied, sucking insects are known to be vectors for plant diseases. They feed on the plant leaves, often leaving behind a sticky substance called honeydew.
This sticky residue can attract ants and other unwanted insects, making the problem worse. It’s important to check the underside leaves of your plants regularly for aphids, as they tend to hide there.
If you spot them, they are generally easy to control. Simply knocking off the aphids with a sharp stream of water is often enough to get rid of them without using harmful chemicals. Regular monitoring and quick action can help keep your green beans safe from these pests.
Thrips
Thrips are tiny pests that can cause a lot of damage to your green bean leaves, flowers, and pods. Although they are very small, their impact can be significant, making it hard to spot them right away.
These pests often overwinter in weeds and plant debris around the garden, which is why it’s important to keep your garden well maintained. By removing unwanted plants and debris, you can help reduce the places where thrips may hide and reproduce.
To keep your green beans safe from these pests, regular garden maintenance is key. The best defense is to make sure that thrips don’t have a place to overwinter. A clean and tidy garden will go a long way in preventing them from causing harm to your crops.
Leafhoppers
Leafhoppers are small, wedge-shaped insects that can cause significant damage to your green beans. They often appear during warm weather and feed by sucking plant juices from the bean foliage, which can also lead to spreading diseases.
These pests are typically light green or gray, making them a little harder to spot in your garden. In my experience, catching them early is key to preventing long-term damage.
To control leafhoppers, one option is using PyGanic 5.0, an organic, broad-spectrum contact insecticide made from pyrethrin, which is derived from Chrysanthemum.
This insecticide is effective, but it should be used in a targeted manner to avoid harming beneficial garden insects. Proper application ensures that your beans stay healthy without affecting the good bugs that help your garden thrive.
Bean common mosaic virus
One day, I noticed my green bean leaves looking strange, with a mosaic-like pattern spreading across them. At first, I thought it was a minor issue, but soon, the infection stunts the growth and even kills some plants.
The worst part? Once affected, there’s no saving them. I had to act fast—I removed the sick plants from my garden and made sure they were thrown away, never adding them to my compost to avoid further spread.
To prevent this in the future, I switched to resistant varieties and kept a close watch on insects. These tiny pests play a big role in the transmission of the virus, so keeping them at bay is essential. Since making these changes, my green beans have been thriving, free from this frustrating disease.
Rust Disease in Green Beans
I once noticed strange brown spots on my bean leaves just before the harvest. At first, I ignored them, but soon, the fungal disease spread quickly, covering the foliage and even the pods. The rust infection thrived in moist conditions, especially when the leaves were wet from overhead watering. To reduce the risk, I made sure to avoid touching the plants when damp and changed my watering method.
After the season ended, I had to remove and destroy all infected beans to prevent spores from surviving and overwintering. If left unchecked, they would return next season, causing more damage. Since then, I’ve taken extra steps to stop the spreading of the fungus, ensuring my crop stays healthy year after year.
SEE ALSO: How Long Does It Take for Bell Peppers to Grow?
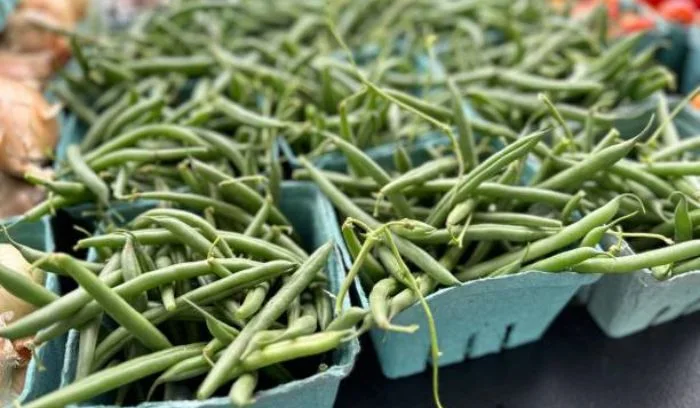
Harvesting Green Beans
When it’s time to pick green pods, make sure they are still tender and not tough or stringy. If left too long on the plant, they lose their best texture. Bush beans should be harvested while they are young to encourage a second or even third flush of production.
For pole beans, harvesting twice a week keeps the plants productive and ensures a steady supply. The right size for picking depends on the variety, so always check what you are growing and when the pods are ready to be harvested.
Use both hands when harvesting to avoid breaking the vines as you pull the pods away. Once harvested, you can enjoy them fresh or store them properly.
Keep them in the crisper drawer inside a container, left whole and unwashed for up to a week. If you want to keep them longer, they can also be frozen or canned for future use.
How Long Does It Take For Green Beans To Grow?
When you decide to grow green beans, you’ll want to consider the type that works best for your space and needs. Bush beans are known for being easier to grow with less maintenance, making them a popular choice for beginners.
These beans produce in about 50 to 55 days, and you can expect all of them to come at once. To ensure a steady supply, it’s a good idea to stagger planting every two weeks. On the other hand, pole beans take a bit longer to grow, usually around 55 to 65 days, but they often yield more and are disease-resistant, giving you more beans over time.
From personal experience, I’ve found that while pole beans require more attention in terms of staking and space, their yield is far greater than that of bush beans.
Bush beans are perfect if you need a quicker harvest, but if you’re looking for a longer season of beans, pole beans are the way to go. Both types of beans are rewarding, and knowing when to plant them can help you enjoy fresh beans throughout the growing season.
SEE ALSO: Which Peppers Look Like Jalapeños? 9 to Know
FAQs
Plant green beans once the danger of frost has passed. For bush beans, plant them 1-1.5 inches deep and space them 2 inches apart in the garden. Expect germination in 7-10 days and harvest in 50-70 days.
To keep harvesting, make successive plantings every two weeks until seven weeks before the first frost. This ensures a steady supply of beans throughout the season
Green beans prefer slightly acidic soil with a pH of 6.5. A soil test provides an accurate recommendation for lime and fertilizer needs. If a test isn’t possible, apply 5-10-15 fertilizer at 5 pounds per 100 feet of row to help them grow strong and healthy.
In my experience, a soil test is the most reliable way to know what’s needed, but if you’re unsure, the 5-10-15 fertilizer is a safe choice for great results.
On average, a bush bean plant can produce about a half-pound of fruit during its entire growing season. However, if you choose climbing beans, they can yield almost double that amount, reaching up to a full pound of green beans per plant. To ensure a decent harvest, you’ll want to plant several plants, as one may not provide enough beans for a full meal. In my experience, direct sowing of the seed is the best and most economical practice for growing green beans, as it helps the plants establish roots easily.
You can pick green beans every day to help them grow more. Harvest them when they are young and tender, before the seeds are fully developed. Look for firm, sizable pods that are as thick as a pencil. Snap or cut them carefully, making sure not to tear the plant.
Yes, raw green beans can be eaten, but the safest way to consume them is cooked. If you choose to eat them raw, be sure to wash them thoroughly under running water, just like any other produce. However, green beans contain lectins, which can cause tummy troubles if eaten in large amounts or without cooking. To avoid any potential discomfort, it’s best to cook them, as this reduces the lectin content and makes them safer to eat.