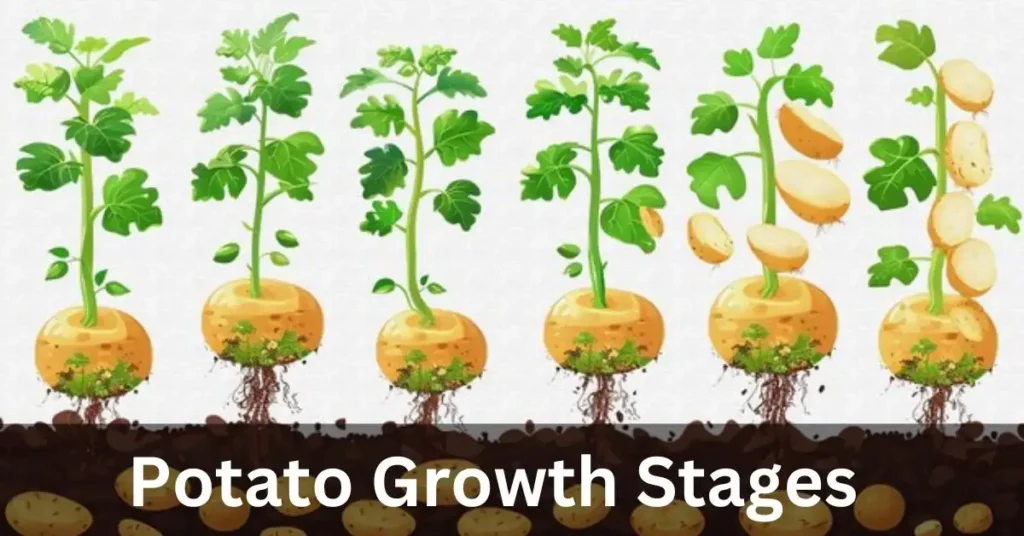
When growing potatoes in your garden, it’s fascinating to observe each of the distinct growth stages they go through. As gardeners, understanding the growth cycle can help you know exactly when to expect your potatoes to be ready for harvest.
Whether you’re growing Solanum tuberosum, a popular annual tuberous vegetable native to South America, or experimenting with different varieties, there’s a lot to enjoy. Potatoes are available in a variety of colors, including white, yellow, red, purple, and blue, and they can vary significantly in size, from small spheres to large specimens.
Throughout the cycle, you’ll see your plant grow vigorously at first, only to eventually die back, leaving behind a pile of earth. As the season progresses, it’s always exciting to carefully uncover the soil and discover new potatoes.
The return you get from a single potato investment can be significant, especially when you dig up between 8 to 10 new ones. It’s a process that’s not only fun, but also a great activity to do with kids. The patience required during this process makes the investment worthwhile when you finally get to reap the rewards of your labor.
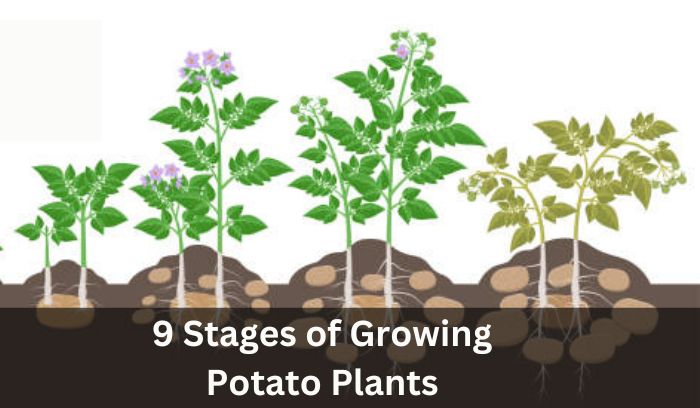
9 Stages of Growing Potato Plants
| #- | Stage | Key Notes |
|---|---|---|
| 1- | Selecting Seed Potatoes | Select certified, disease-free seed potatoes instead of those from the grocery store. Buy quality seed potatoes. |
| 2- | Planting | Plant in spring for a cool season crop. Protect from late frosts. Prepare planting site and chit potatoes as needed. |
| 3- | Sprouts | After weeks, sprouts emerge from potato eyes and grow into leafy green shoots. |
| 4- | Vegetative Growth | Plants grow larger and fuller with rapid growth. Green leaves use sunlight to produce energy. Tubers start to form below the ground. |
| 5- | Tuber Formation | After sprouting, the plant creates all tubers for the season. Small, beanlike growths develop on roots. Keep the soil evenly moist. |
| 6- | Tuber Growth | Flowers bloom, and blossoms can be white or pale purple. |
| 7- | Flowering | The plant goes through final maturation as top vegetation yellows and dies back. Tubers continue to finish maturing. |
| 8- | Maturation | Top vegetation gradually dies back, and the tubers continue to mature. |
| 9- | Harvest | Harvest after vegetation dies back. Loosen soil with a garden fork. Store in a cool, dark, well-ventilated place for up to 8 months. |
The potato plant typically takes anywhere from 60 to 120 days to go from planting to harvest, depending on the variety. For the crop to truly thrive, it’s important to provide the best growing conditions, including proper soil moisture and nutrition.
These factors play a significant role in ensuring a successful harvest and the overall benefit of your potato plants. Maintaining healthy growing conditions will help your potatoes grow strong and healthy, reaching their full potential. By focusing on soil moisture and nutrition, your potato plant will have the best chance of producing a high-quality crop in the given time frame.
Potato Growing Basics
Light
For growing potatoes, full sun is crucial. The plants need at least 6 hours of direct sunlight every day to grow strong and healthy. Sunlight helps potatoes produce the energy they need for root and tuber development.
Without enough light, the plants may struggle, leading to poor growth and a smaller harvest. If you’re planting in a garden, choose a spot that gets plenty of sun throughout the day to ensure your crop thrives. From my experience, potatoes do best when they get consistent sunlight exposure.
So, make sure your plants aren’t shaded by larger plants or structures. If your space is limited, consider rotating the plants to get the maximum amount of light each day. It really makes a difference in the quality and quantity of potatoes you harvest.
Temperature
When growing potatoes, it’s important to keep the ideal temperature range in mind. Warm, but not hot, conditions are best for healthy growth. During the day, the temperature should be between 65°F and 80°F, while at night, it should cool down to around 55°F to 65°F. These temperatures provide the right balance for the potato plants to thrive without getting stressed from extreme heat or cold.
From my experience, keeping the temperature within this range ensures that your potatoes will develop strong roots and healthy tubers. If temperatures get too high, like above 80°F, potato plants may not grow properly. On the other hand, if it gets too cold, below 55°F, it can stunt their growth. Proper temperature control is key to a successful potato harvest.
Soil type
When growing potatoes, the soil type plays a big role in how well your crop will thrive. Potatoes prefer well-drained soil that isn’t too heavy or soggy. A loamy soil is perfect because it allows water to drain well, ensuring the potatoes have enough moisture without being waterlogged.
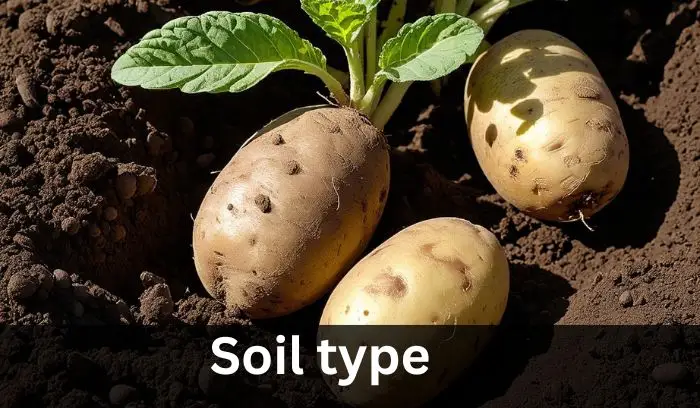
This type of soil also provides the right balance of nutrients for healthy growth. If your soil is too compact or heavy, consider improving drainage by adding organic matter or compost to create a loamy texture.
Soil Moisture and Its Importance
When it comes to growing potatoes, the right soil moisture is essential for healthy development. Potatoes need consistent moisture to thrive, but the soil shouldn’t be too wet or damp. It’s important to maintain a balance in the moisture-rich soil to ensure that your plants have just the right amount of hydration.
Too much moisture can lead to poor drainage and saturation, which may cause the roots to rot or wilting. On the other hand, if the soil becomes too dry, the potatoes won’t absorb the water they need to grow, affecting the growth rate and overall crop quality. The key is to keep the soil at a proper level of moisture, not too excessive and not too dry, to help the roots develop fully.
Ensuring the right moisture involves a steady supply of water throughout the growing season. Irrigation can help maintain the level of moisture, but it’s crucial to avoid overwatering, as this may lead to poor air circulation in the soil and disturb its texture. A well-drained, porous soil ensures that water doesn’t pool, providing an ideal environment for healthy root growth and fertility.
The surface of the soil should be regularly checked for fluctuations in moisture, as excessive or insufficient water can stunt growth and impact the crops. By managing moisture carefully, you create a stable environment that promotes strong, productive plants and healthy, thriving potatoes.
Soil pH and Its Impact on Potato Growth
For successful potato growing, maintaining the right soil pH is crucial. Potatoes thrive in slightly acidic soil, with a pH range between 5.0 and 6.0. If the pH level is outside this range, the roots may struggle to absorb nutrients effectively, leading to slower growth and poor development.
In my experience, keeping the soil in the optimal pH range helps ensure that potatoes receive the right balance of nutrients for healthy and strong plants. Soil that is too acidic or too alkaline can affect the fertility of the land, hindering the growth rate and survival of your crops.
To maintain a healthy crop, it’s important to regularly check the soil condition and make necessary adjustments to ensure the pH remains within the optimum range. This helps create a stable environment for the root system to develop and thrive.
A proper pH level contributes to the texture and moisture retention of the soil, which supports the absorption of water and nutrients. With the right conditions, potatoes will grow more productively, leading to a higher yield and a better overall crop.
Fertilizing for Healthy Potato Growth
When growing potatoes, proper fertilizer application is key to ensuring strong, healthy plants. After planting, it’s recommended to fertilize your potatoes about 2 weeks later and again 4 weeks after that. Using a balanced, slow-release fertilizer helps provide a steady supply of nutrients over time, supporting the growth and development of the plants.
Always follow the directions on the package to avoid over-fertilizing, which can harm your crops. The right amount of fertilizer will promote healthy plants, strong roots, and a more productive crop.
Fertilization plays an important role in maintaining soil conditions and ensuring the potatoes receive the nutrients they need for optimal growth rate. A good fertilizer helps balance soil texture, supports the root system, and boosts the absorption of water and nutrients.
This makes it easier for potatoes to thrive, especially during different stages of their growth cycle. Over time, the right maintenance and application of fertilizer will lead to better productivity and increased growth in a stable environment, ensuring a successful harvest.
Effective Weed Control for Healthy Potato Growth
Weed control is an essential part of potato growing basics. Weeds can compete with your plants for valuable nutrients and moisture, slowing down their growth rate and affecting overall crop productivity. One effective method is to remove weeds regularly from the soil around your potatoes.
This helps maintain the soil condition and ensures that your potatoes have enough resources to develop healthy roots. Mulching around your plants also plays a crucial role in preventing weed growth by blocking sunlight and creating a barrier that makes it harder for weeds to take root.
In addition to mulching, proper spacing between your potato plants allows for better air circulation and reduces the chances of weeds taking over. By focusing on prevention and regular maintenance, you can keep the environment around your plants free from excessive competition.
With the right amount of protection, including using mulch and maintaining a weed-free zone, your potatoes will have the support they need to thrive and grow in optimal conditions throughout the season.
9 Stages of Growing Potato Plants
Stage 1. Selecting Seed Potatoes
When it comes to selecting seed potatoes, it’s important to buy from a reputable supplier to ensure that you’re getting certified, disease-free seed potatoes. These are not the same as regular fresh-eating potatoes, as they are specifically grown to produce a healthy crop of new potatoes.
While you can try growing potatoes from actual seed, like the fast-growing Clancy variety, using seed potatoes is much easier and more reliable. Seed potatoes may have small sprouts already, but avoid those with mushy spots, gashes, or any signs of mold, as these can affect your crop. It’s best to choose firm, healthy, and unblemished potatoes for the best results.
When buying seed potatoes, make sure they are free from fungal spores that can introduce diseases to your garden. This is especially important if you are growing related crops like tomatoes and peppers, as fungal infections can spread.
If you’re ordering online, check that your supplier sends them near planting time, ensuring they are fresh and ready to go. You may need to store them in a cool, dark place until planting, maintaining a temperature between 45°F and 50°F with good ventilation and humidity to avoid rot. Taking these steps will help you grow a healthy, high-yielding
Stage 2. Planting Potatoes
When you plant potatoes, it’s essential to understand the ideal conditions for them to thrive. Potatoes are typically a cool-season crop, which means they grow best in spring or fall for a summer harvest.
It is essential to ensure that there is no risk of frost before proceeding with spring planting. If a light frost does occur, protect your plants. Choose a planting site that gets plenty of direct sunlight for at least 6 hours a day, and make sure the soil is loose, well-drained, and not too wet to avoid rot.
Before planting, prepare your soil by cultivating it to a depth of 8 to 10 inches, and add organic matter such as manure or compost to feed the potatoes as they develop. If you’re using seed potatoes, you can plant them whole if they’re small. For larger potatoes, you can cut them in half or into quarters, ensuring each piece has at least one eye to sprout.
Let the cut pieces air dry for a few days in a well-ventilated area to allow the cut edges to become leathery and prevent rot. After the drying period, plant the pieces in rows, hills, or containers, with the eyes facing up. Space the potatoes 8 to 12 inches apart and cover them with soil, adding mulch like straw to help retain moisture and encourage healthy sprouts.
Stage 3. Sprouts
When a seed potato is planted, each eye possesses the capability to develop into a new vegetative shoot. These sprouts first appear as small white or pink growths emerging from the potato. If your seed potatoes start sprouting before planting, don’t worry!
This is quite normal, and it gives you a preview of the sprouts to come. Once you plant them in the ground, the sprouting process continues underground, where it will take about 2 to 4 weeks for the first sprouts to emerge from the soil surface.
As the potato plant grows, it begins to use the energy stored in the tuberous potato, which will eventually shrink, wither, and disappear. The plant will develop new roots and fresh green vegetation. Over time, the plant will form new potatoes. The sprouts and their growth mark the early stages of the potato’s journey to becoming a thriving plant, producing the potatoes we all love to harvest.
Stage 4. Vegetative Growth
During the vegetative growth stage, your potato plants will grow quickly, becoming bigger and more bushy. You may observe either one stem or several stems emerging from each plant.
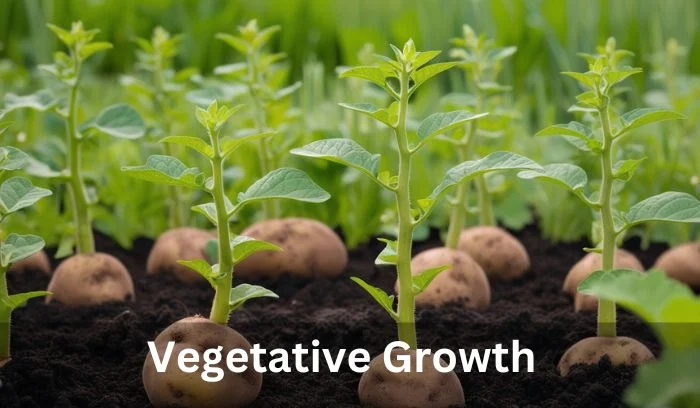
At this point, there’s no need for thinning. The plants will continue to grow both above and below the soil surface, working hard to produce the next crop. As the plants develop, you’ll see the green sprouts emerge, signaling the start of the growing process.
The duration from the initial germination to the complete maturation of the plant can vary between 60 and 100 days. The majority of vegetative growth takes place between the sprouting and flowering phases, with the plant growing rapidly. After flowering, the plant begins to die back, and this marks the end of the vegetative growth phase, making way for the bulk of the crop to form.
Foliage Pests and Diseases
Potato plants are often affected by various foliage problems caused by pests and diseases. These plants are particularly susceptible to harm, especially during growth. For a home gardener, dealing with numerous issues might feel challenging compared to managing a large farm, but understanding the most common above-ground threats can help maintain healthy crops. By staying proactive and observing the plants regularly, many problems can be managed effectively before they escalate.
Among the key concerns, certain pests like aphids and leafhoppers target potato foliage, feeding on sap and spreading harmful pathogens. These intruders are a significant threat not only for home gardeners but also for larger-scale farming.
Additionally, fungal and bacterial diseases can weaken plants if ignored. By monitoring the foliage closely and taking preventive measures, such as removing infected parts or using eco-friendly pesticides, gardeners can protect their plants and ensure healthier growth.
Potato Leafhopper
The Potato Leafhopper, recognized by its green body and small spots, is a significant threat to potato plants. These pests typically feed on the undersides of the leaves, which often leads to visible damage such as brown spots, yellowing, and even wilting. This may diminish the plant’s strength, thereby impairing its capacity to flourish.
As a gardener, selecting pest-resistant potato varieties can be an effective way to protect your crops. Observing the leaves closely is essential to catch early signs of an infestation.
If leafhopper nymphs are spotted, you can use a hard jet of water spray to physically remove them from the plant. In cases where the problem continues, applying insecticidal soap can help control the population.
While using insecticides, it is important to proceed with caution to avoid harming beneficial insects and the environment. Regularly monitoring your plants and acting swiftly is key to preventing severe damage.
Colorado Potato Beetle
The Colorado Potato Beetle is an oval-shaped beetle with a yellowish body, featuring black stripes and small spots. Both adults and larvae pose a significant threat to potato plants as they chew holes in the leaves, which can weaken the plant. When there is a heavy infestation, the damage can become so severe that it may kill the plants entirely.
To manage this pest, gardeners can hand-pick the adults and larvae from the plants to prevent further destruction. Monitoring for early signs of infestation is crucial, as addressing the problem early can stop it from spreading. Removing these pests manually is a simple yet effective solution, especially when dealing with smaller gardens.
Flea Beetles
Flea Beetles are tiny, often black or brownish, and are known for the damage they cause to plant leaves. These pests feed by creating many small holes, which can weaken the foliage and stunt plant growth.
Beyond physical damage, they may also transmit blight, a serious concern for many gardeners. Maintaining a clean garden area by keeping it free of weeds and leafy debris is an effective preventive measure to reduce their habitat and spread.
When dealing with these pests, it is important to use insecticides with caution, especially in smaller gardens or near edible crops. Regular monitoring and quick action can prevent infestations from escalating. Keeping plants healthy and ensuring proper care can minimize the impact of flea beetles, protecting your garden from further harm.
Stages 5. Tuber Formation
Around 15 to 30 days after the sprouts first appear, the potato roots enter a new phase where they begin to produce new tubers. At first, these tubers start as small, bean-sized lumps along the root system. The plant focuses its energy on developing these existing tubers, allowing them to grow larger.
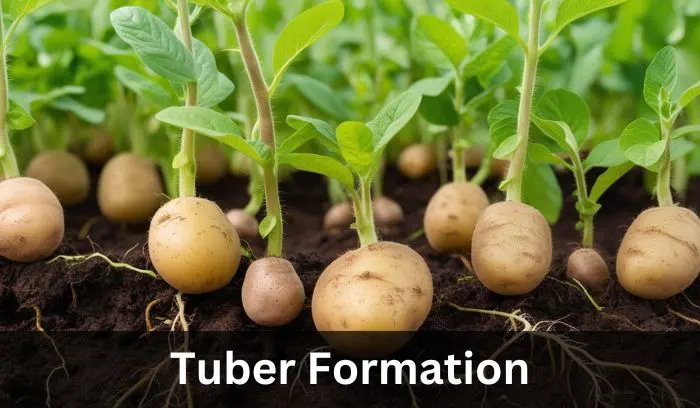
While above ground, the plant is busy producing vegetative growth like new leaves, which makes the plant taller, below ground, the roots are busy trying to form buds for as many as 20 or 30 tubers, though not all will reach maturity.
The number of tubers that will actually reach full maturity depends on several factors like growing conditions, soil moisture, and nutrients available. On average, 5 to 15 tubers per plant will reach maturity, which can vary depending on the weather, moisture, and production rates during this crucial phase. It’s important to maintain consistent soil moisture and the ideal growing environment to ensure an excellent harvest later.
How to increase potato tuber size?
To grow larger potatoes, it’s important to focus on maintaining a healthy leaf canopy. A strong leaf canopy prolongs the plant’s ability to produce energy, which in turn helps the potatoes grow bigger. Additionally, balanced nutrition plays a key role in increasing the average tuber size.
Providing your potatoes with the right amount of nutrients, such as nitrogen, phosphate, potassium, calcium, magnesium, and manganese, can significantly affect their growth. Each of these nutrients is crucial for the proper development of the tubers, helping them to increase in size and quality.
As the plants grow, ensure they receive adequate care by monitoring soil health and providing regular watering. Correct nutrient management, along with proper environmental conditions, will directly contribute to the overall size and yield of your potatoes. A combination of these factors will help you achieve larger, healthier potatoes ready for harvest.
Stages 6. Tuber Growth
The tuber growth phase, or tuber bulking, occurs between 45 and 90 days after the first sprouts appear. During this time, the potato plant focuses on growing its tubers larger. The tiny buds formed earlier begin to swell and develop into full-size potatoes as the plant stores nutrients, carbohydrates, and energy in them.
As the new tubers develop, the plant simultaneously reallocates energy from its above-ground parts. You won’t be able to see the tubers growing since this happens underground. It’s important to keep them protected from sunlight, as exposure to the surface can cause them to turn green and bitter.
To ensure healthy tuber growth, gardeners often use hilling — the practice of adding fresh soil or hay around the base of the plant. This keeps the tubers underground, protecting them from the sun and helping prevent the growth of weeds. The plant may start showing signs of slowing down, with yellowing leaves, but don’t worry, this is normal.
The plant is focusing all its remaining energy into growing the final size of the tubers. To help the plant thrive, provide ideal growing conditions such as moist soil, bright sunlight, and enough space for each plant. Consistent watering is key, as uneven watering can lead to cracking, splitting, or the development of hollow, airy pockets inside the potatoes.
Tuber Pests and Diseases
Potato Tuberworm
The potato tuberworm is a pest that can cause serious damage to your crops. Whitish or brownish caterpillars, the larvae of the potato tuber moth, bore into the potato tubers, leading to extensive damage. They also eat holes in the potato leaves, further harming the plant. These pests primarily affect the tubers closest to the soil surface.
To prevent tuberworm damage, it’s important to keep potatoes completely underground. This helps reduce the chance of larvae reaching the tubers. In my experience, consistently monitoring the plants and keeping the soil covered has been an effective way to protect potatoes from this destructive pest.
White Grubs
White grubs are grub-like larvae of beetles that can cause serious damage to many crops. These grubs chew on stems, roots, and tubers, especially in the underground areas. The damage often occurs before the above-ground plant shows any visible symptoms. This makes it harder to notice until the plants begin to decline.
A good way to reduce the damage from white grubs is crop rotation. By changing the planting area each season, you limit the access of these pests to your crops, helping prevent an infestation. In my experience, rotating crops is an effective method to protect your plants from unseen underground threats like white grubs
Common Scab
Common Scab is a bacterial infection that affects the outer skin of potato tubers. This infection causes inflammation, resulting in rough, scabby patches on the surface of the potato. It can be particularly damaging if left untreated, as it reduces the quality of the tuber and makes it less appealing for sale or consumption. From personal experience, I’ve found that using disease-resistant seed potatoes can significantly reduce the risk of common scab.
To prevent this disease, it’s essential to grow potatoes in acidic soil, as this condition is less favorable for the bacteria. Over time, managing soil health and selecting the right seeds has proven to be an effective strategy in avoiding this issue. Keeping the growing environment healthy helps reduce the chances of bacterial infections affecting your potato crops.
Bacterial Soft Rot
Bacterial Soft Rot is a common bacterial infection that affects potato tubers, causing them to develop soft spots. The infection thrives in wet soil, which can lead to significant damage if potatoes are left sitting in these conditions. The soft spots are a clear sign of rot, and once this happens, the potatoes can become unfit for consumption or storage.
To prevent bacterial soft rot, make sure to cure or dry the tubers thoroughly before storage. This step is essential to ensure the potatoes remain healthy and resistant to infection. In my experience, paying attention to soil conditions and taking proper care during storage significantly reduces the chances of rot spreading.
Stages 7. Flowering
The flowering stage happens towards the end of tuber growth and marks the beginning of maturation for potatoes. These plants are considered flowering plants, and they usually bloom about 60 to 70 days after planting.
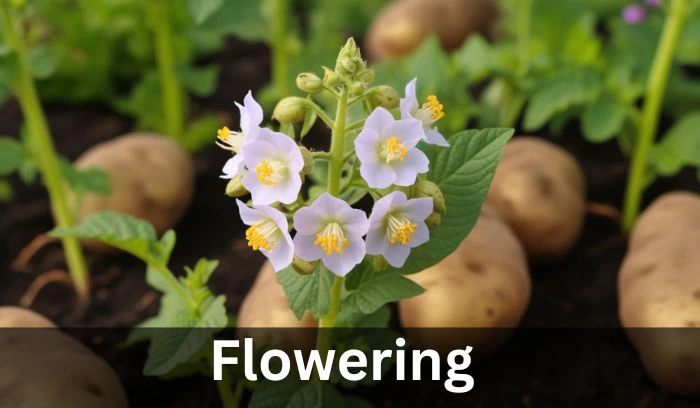
The flowers of potatoes are small, showy, and attract pollinators, which can be a helpful bonus for the garden. While the flowers don’t directly relate to the potato tubers, they still play an important role in the plant’s growth cycle.
The flowers are typically white or pale purple, with prominent yellow anthers. Some varieties of potatoes may have darker pink flowers or even dark red or purple anthers. Each blossom endures for merely a few days, yet it indicates that the plant is approaching the conclusion of its life cycle. Watching these flowers bloom can be an exciting part of growing potatoes, as it indicates your plants are on their way to producing healthy tubers.
Stage 8. Maturation
When you’re growing potatoes, the most crucial stage is the maturation process, where the plants finish their growth and prepare for harvest. This phase typically lasts anywhere from 10 to 20 days.
During this time, the leafy and green parts of the plant begin to turn yellow and die off, signaling that the above-ground parts of the plant are reaching their end. As the plant shrivels up, the potatoes continue their growth beneath the soil, staying safe and developing further until they reach their maximum size.
It’s important to recognize that even when the above-ground part has completely died back, the potatoes themselves are still underground, and they’re nearly ready to be harvested.
At this point, you’ll notice that they have grown as large as possible. This is when you know it’s the right time for the final step—harvesting your potatoes. Understanding this natural process is key to ensuring you get the best yield, with every potato at its full potential.
Stage 9. Harvest
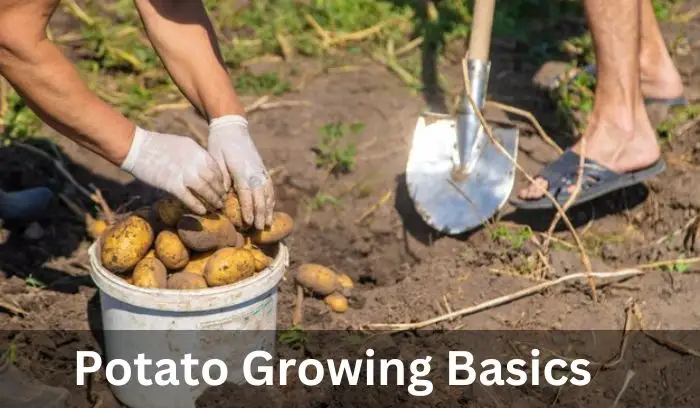
After waiting for 120 days, it’s finally time for the fun part—digging up your potatoes! You’ll need to put on your work gloves, grab a garden fork, and have a basket ready to collect your harvest. Depending on the variety you’ve planted, harvest times can differ.
Baby potatoes can be ready as early as 2 or 3 weeks after your plants finish flowering, while a more mature potato that you want to bake or store will need additional time in the ground. Make sure the plant foliage has completely died back before you start digging for fully mature potatoes.
To dig up your potatoes, use your garden fork to carefully loosen the soil around the base of the plant. Be cautious near the main stem to avoid piercing the tubers. As you turn the soil, you’ll uncover a mass of potatoes. The weather can play a big role here—if it’s warm and dry, you can leave the potatoes in the sun for a few hours to allow their skins to cure, making them more durable for storage.
Once dried, store your potatoes in a cool place, ideally between 45°F to 50°F, and they can last up to 8 months. Just remember, don’t store them in an airtight container; they need good ventilation to avoid rotting. If left in a bright or warm area, they may start to sprout.
How Long Does It Take For Potatoes To Fully Grow?
When you plant early-season potato varieties in spring, they typically take 60-80 days to be ready to harvest. These potatoes grow quickly, so if you’re looking for a fast crop, early-season varieties are a great option. On the other hand, mid-season potato varieties require a bit more time and usually take 80-100 days to mature.
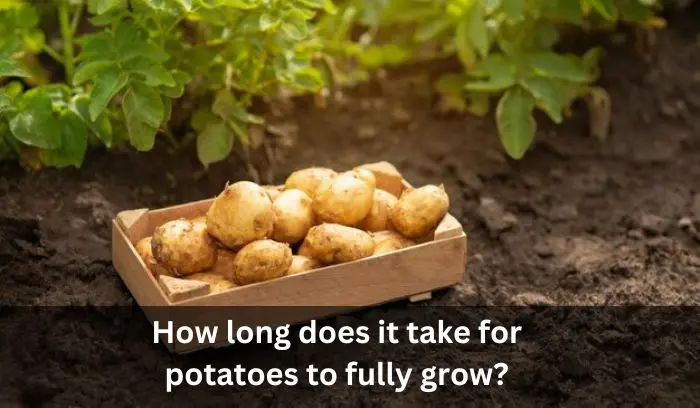
Finally, the late-season potatoes need the most time, often requiring 100-130 days before they are ready to harvest. Whether you’re growing potatoes for quick results or a longer harvest, each type has its ideal timeline. I’ve personally found that adjusting to these times can help you get the most out of your garden, allowing you to plan ahead for harvest and storage.
Tips for a Healthy Crop
Crop rotation
Crop rotation is an essential practice for maintaining a healthy crop. Certain plants, like potatoes, tomatoes, and peppers, often attract many pests and are susceptible to similar diseases.
Planting these crops in the same location for successive years allows pests and diseases to build up, making it harder to manage over time. By rotating crops to a different place each year, you can help prevent these problems from accumulating.
From personal experience, rotating crops not only protects plants but also improves soil health. For example, switching the planting location of potatoes one year and peppers the next disrupts pest cycles.
This method reduces reliance on pesticides and fosters a balanced growing environment, helping plants thrive naturally. Regular crop rotation ensures stronger yields and healthier gardens.
Soil moisture
Maintaining proper soil moisture is key to a healthy crop. It’s important to keep soil uniformly moist, but not excessively wet, as this can lead to problems like rot. Potatoes, in particular, are sensitive to soggy soil, which can cause them to rot if conditions are not carefully managed. From experience, I’ve found that monitoring the soil consistently helps prevent any issues.
To achieve the right balance, avoid large fluctuations between wet and dry soil. These changes can stress plants and reduce their ability to grow effectively. Keeping the moisture consistent not only protects crops but also promotes steady development and strong yields. Simple measures like adjusting watering schedules can help ensure crops thrive in all conditions.
Be proactive
To maintain a healthy crop, it’s essential to check potato plants regularly for signs of trouble. Staying alert to potential pests and observing any changes in your plants’ health can help you act quickly. Problems that are caught early are much easier to handle. For example, if I notice unusual spots or damage, I make it a point to identify the issue and treat it promptly before it spreads.
Being proactive ensures that small issues don’t turn into major setbacks. Regular inspections of your crops help you stay ahead of potential threats, making your garden more resilient. Whether it’s pests or diseases, addressing problems early keeps your plants thriving and ensures better harvests.
Keep the area clean
To ensure a healthy crop, it is important to keep the area around your plants clean and free from potential hazards. Weeds, infected plants, and leafy debris can harbor pests that might attack and feed on your potato crops. Regularly removing these unwanted materials helps to create a safer growing environment for your plants and reduces the risk of pest infestations.
From experience, maintaining cleanliness around the garden prevents many issues before they start. Keeping the area away from debris not only supports plant health but also makes it easier to monitor for signs of trouble. A clean garden space minimizes hiding places for pests and ensures that your plants can thrive without unnecessary threats.
Insecticides
When using insecticides, always proceed with caution to protect your plants and the surrounding environment. It’s best to start with less-damaging methods, such as hard water sprays, or consider options like insecticidal soaps and horticultural oils.
These approaches are effective at managing pests while minimizing harm to beneficial organisms. If the infestation continues, you can gradually increase the potency of the treatments, but only treat infected plants to avoid unnecessary exposure to chemicals.
While potatoes do not depend on pollinators to produce a crop, many other plants in your garden do. By carefully managing pest control, you can ensure that pollinators remain unaffected and able to thrive. Thoughtful pest management protects the balance of your garden while helping your plants stay healthy and productive.
Companion plants
Using companion plants is an effective way to grow healthy crops while protecting them from pests. Certain plants can benefit potatoes by improving soil quality and repelling pests naturally. For instance, beans, cabbage, and carrots are excellent companions that enhance growth and reduce threats. From my experience, planting garlic and cucumber alongside potatoes creates a balanced and productive garden environment.
Including a variety of good companion plants like corn, lettuce, and peas not only supports the main crop but also boosts the overall health of the garden. These companions help maintain soil richness and reduce dependency on chemical pest control. Pairing the right plants together ensures a thriving and sustainable crop throughout the growing season.
Will Potatoes Still Grow Without Leaves?
Even without leaves, potatoes can still grow. Potatoes are a hardy crop, and they have a strong ability to bounce back from damage. If the leaves are gone, the plants won’t be fully lost. New shoots can emerge from below the soil, and new leaves may start growing on the stalks that are left behind.
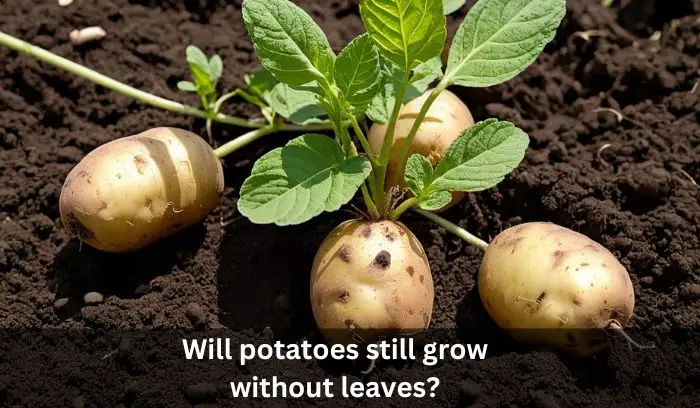
As long as there is enough nutrition and moisture, these resilient plants will continue their growth process, showing their ability to recover even after setbacks. It’s a reminder of how adaptable potatoes can be when given the right conditions.
Potato Growth Stages in Water
Growing potatoes in water involves distinct stages. First, shoots begin to emerge within 15–30 days, followed by vegetative growth as the plant becomes bigger and taller. After 15–30 days, tubers start to form, but they remain smaller compared to those grown in soil. In the tuber bulking phase, the tubers fill out after 45–90 days, and by 90–120 days, the potato reaches maturity and is ready to harvest.
| Growth Stage | Time Frame | Key Features |
|---|---|---|
| Sprouting | 15–30 days | Shoots emerge |
| Vegetative Growth | Ongoing | Plant grows bigger |
| Tuber Growth | 15–30 days | Tuber formation |
| Tuber Bulking | 45–90 days | Tubers begin to fill |
| Maturity | 90–120 days | Ready to harvest |
What Is The Lifespan Of A Potato?
Potatoes can be stored in different conditions to maximize their shelf life. When raw, they last 2–3 months at 50°F (10°C) and 1–2 weeks at room temperature. Cooked potatoes last 3–4 days in the fridge and 10–12 months frozen.
| Storage Condition | Shelf Life |
| Raw (50°F / 10°C) | 2–3 months |
| Raw (Room Temperature) | 1–2 weeks |
| Cooked (Refrigerated) | 3–4 days |
| Cooked (Frozen) | 10–12 months |
FAQs
After planting a seed potato or seed piece, the sprout emerges from the eyes. Within two to six weeks, the seedling starts to grow, and the root system absorbs essential nutrients from the soil. The main stem and first leaves also begin to form.
During this stage, the leafy part of the plant grows rapidly. With adequate sunlight, photosynthesis occurs in the leaves and stems. Stolons (underground stems) develop, forming tubers above the seed piece. The main stem stops growing, and the plant produces a flower bud.
Tubers form at the ends of stolons about five to six weeks after the sprouts emerge. The stolon tips swell, and the tuber development process starts. The presence of flowers indicates the plant’s nutrient process is focused on tuber growth.
During tuber bulking, sugars and starches accumulate in the newly formed tubers. Ideal conditions include daytime temperatures between 60° and 65°F, night temperatures below 57°F, and adequate soil moisture. Extreme heat, particularly above 84°F, reduces starch storage as the plant respires heavily.
Potatoes are ready for harvest when the tuber skins harden, and the leaves and stems dry out. Depending on the variety, this stage occurs 10 to 26 weeks or 70 to 120 days after planting. A mature potato’s skin doesn’t rub off easily, indicating it is suitable for storage.
Final Thoughts
Cultivating potatoes at home is an enjoyable and fulfilling endeavor. You might find just 3 or 4 potato varieties at your local grocery store, but when you plant your own, there are over one hundred unique varieties to choose from. Start with seed potatoes in spring and make sure to use certified disease-free seeds to avoid any issues.
Your plants will need plenty of sunlight, moist soil, and hearty nutrition to grow strong. Be on the lookout for mid-season pests, as they can affect the growth, but as long as your potatoes stay underground, you’ll be able to enjoy the best part—the harvest.
The real joy of growing homegrown potatoes is when you finally get to dig them up in mid-summer, once they’re ready to harvest. Whether you want to cook them for dinner tonight or store them for later, the hard work pays off.
From planting your seed potatoes to watching them grow, every step is full of learning and excitement. Whether you’re making mashed potatoes, fries, or just baking them, nothing beats the flavor of freshly grown potatoes from your own garden.
See Also:
How Long Does It Take to Grow Bell Peppers in Minnesota? A Complete Guide
Lilies Slow to Break Ground? Here’s Why and How to Fix It!

