Starting to grow Lemongrass in zone 9a can be tricky, especially for new gardeners. Timing is key for a bountiful harvest and plant happiness. One of the best gardening tips I’ve learned is to start seeding in early spring, when the weather is warm but not too hot.
Lemongrass thrives in a climate with plenty of sunlight, so make sure the local weather conditions are right before you begin. The timing for seeding can vary depending on your exact location, so always check the unique guide from trusted resources like Garden Chains for the best advice tailored to your area.
The seed needs to be planted carefully and kept well-watered until it starts to grow. If you are unsure about how much sunlight or water is best, don’t worry—many easy tips can help you get it just right. Just remember to follow the steps based on your local weather and tweak the advice from the guide if necessary to ensure your Lemongrass grows strong and healthy.
Key Points
| Factor | Details |
| Optimal Timing | Start seeding in early spring when weather is warm but not too hot. |
| Last Frost | Ensure the last frost has ended before planting. |
| Soil Temperature | Ensure soil is warm enough for lemongrass to grow strong. |
| Winter Climate | Zone 9a has a mild winter with occasional cold spells and light frosts. |
| Avoid Early Planting | Planting too early may result in stress due to cold temperatures. |
| Local Advice | Consult local gardening guides like Garden Chains for tailored advice. |
Why Timing Matters for Lemongrass Seeding in Zone 9a?
In zone 9a, the timing of lemongrass seeding is essential. The nature of lemongrass requires the right climate and condition to grow properly. Planting seeds at the wrong time can affect the growth and bountiful harvest.
The unique weather patterns in zone 9a make it especially important to choose the best moment for planting. As a gardener, I’ve found that getting the timing right is one of the most important reasons for success.
Reason 1: Nature of Lemongrass
Lemongrass is a tropical herb that grows best in sunny and warm climates. It grows naturally in tropical environments, making it sensitive to cooler climates. In zone 9a, it’s important to plant lemongrass at the right time to avoid the risk of damage from cold temperatures.
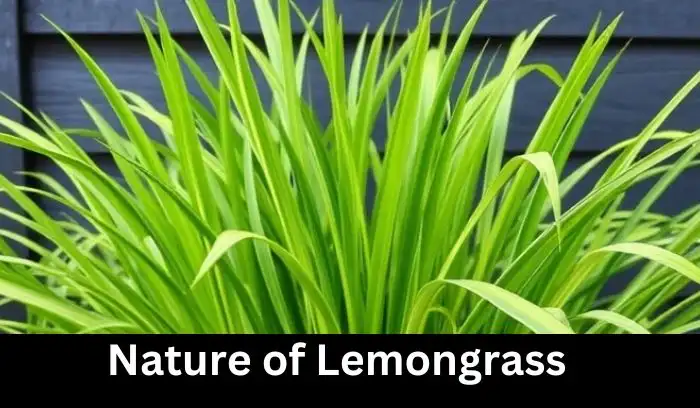
Lemongrass does not handle frost well, and low temperatures can severely harm or kill the plant. The weather in zone 9a requires careful planning, as you want to plant it only when the environment is suitable for its growth.
When planting lemongrass, the temperature should be consistently warm. It’s essential to wait for the right moment when the weather is stable and free of frost. This timing ensures the plant can grow without stress and reach its full potential.
Having grown lemongrass myself, I’ve learned that understanding the climate and planting at the correct time is crucial for a healthy harvest.
Reason 2: Climate of Zone 9a
The climate in zone 9a is generally known for its mild winter. While the temperatures are usually moderate, it can still bring occasional cold spells and light frosts, especially in early spring.
This can be a challenge for plants like Lemongrass, which need a warmer environment to grow successfully. When planting seeds in zone 9a, it’s important to wait for the last frost to pass, as Lemongrass will likely struggle with the cold if planted too early.
Once the weather warms up, the environmental conditions become ideal for Lemongrass to thrive. Understanding the plants’ needs and the specific climate in your zone will help ensure the best growth.
In addition to Lemongrass, zone 9a is also great for growing spring plants and even the fastest fruit trees. Timing your planting based on the local climate is key to getting the most out of your garden.
What Makes Lemongrass Special?
Lemongrass is a unique perennial herb that stands out with its fresh flavour and lemony scent. It’s a fantastic addition to gardens and kitchens, offering a tropical aroma that elevates cooking, especially in dishes like curries or in a warm cup of tea.

Although it’s technically a grass, its stalks have a zesty shape, making it visually appealing as well. The exotic look of lemongrass brings an attractive touch to any garden, giving it a vibrant and fresh feel without needing much attention.
Grown easily in warm climates like zone 9a, lemongrass thrives effortlessly with minimal care. Apart from being a culinary delight, it’s also popular in natural and DIY home remedies, adding versatility to its appeal. Whether you’re growing it for its fragrance, its use in cooking, or simply for its ornamental beauty, lemongrass is truly a special plant to have around.
Why Should We Grow Lemongrass?
Lemongrass is a fantastic addition to any garden, offering more than just its vibrant blades that beautify the space. For gardeners, it’s an easy plant to grow, requiring minimal care while providing numerous health benefits.
The plant has been used in traditional medicine for centuries, with various health advantages such as acting as a digestive aid, stress reliever, and analgesic. Its chemical ingredients have natural antimicrobial properties that help fight off unwanted bacteria and fungi, making it a valuable herb in many home remedies.
In addition to these benefits, lemongrass supports the immune system, helps reduce body inflammation, and even works as a skin enhancer. When used in tea, it promotes relaxation and helps with digestion and bloating, offering a soothing experience. Whether for its medicinal uses or its ability to enhance the garden, lemongrass truly stands out as a versatile and beneficial plant to grow.
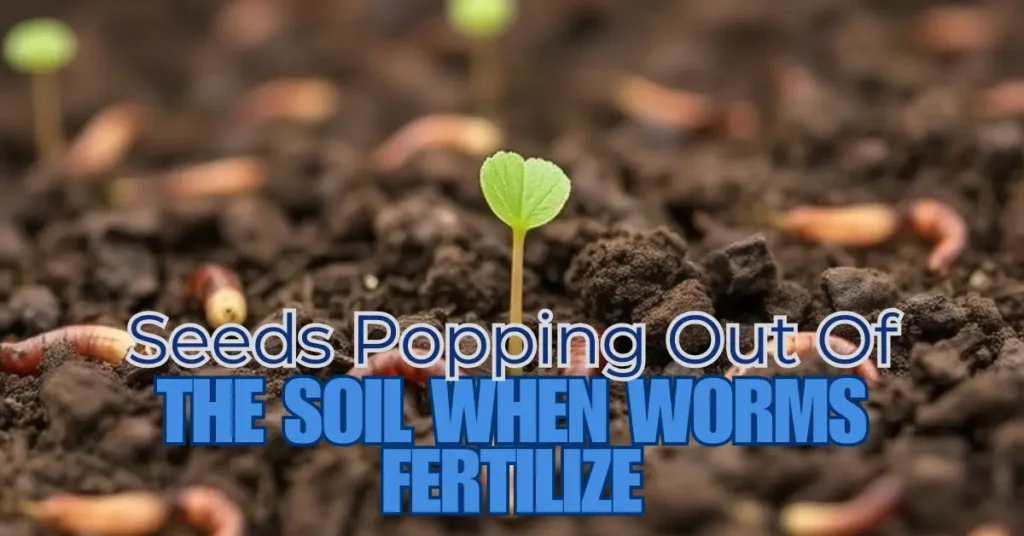
See Also: Why Are Seeds Popping Out of the Soil When Worms Fertilize?
Understanding Zone 9a for Lemongrass Growth
When it comes to growing Lemongrass, understanding your specific zone is crucial. Zone 9a is known for its warmer climates, making it a foremost choice for planting Lemongrass. This zone provides the ideal environmental conditions where plants thrive. If you’re familiar with the U.S.
Department of Agriculture’s hardiness zones, you know they help gardeners determine which plants do well in specific areas. The climate patterns in Zone 9a ensure that Lemongrass will grow easily, and planting it in the right conditions will lead to a healthy and abundant harvest.
It’s essential to consider the zone when deciding when and where to plant Lemongrass. The warmer climates of Zone 9a offer a perfect environment, but understanding the local climate helps ensure Lemongrass thrives and grows strong without struggle. Gardeners in Zone 9a can enjoy the benefits of this tropical herb, knowing that its growth will be supported by the unique characteristics of the area.
What is Plant Hardiness Zone 9a?
In Zone 9a, the climate is known for its mild winter, with minimum temperatures ranging from -6°C to -3°C. This zone benefits from plenty of sunshine during the summer, but it can also experience chilly winter days. The longer growing season makes it ideal for growing both tropical and subtropical plants, including Lemongrass. Many regions within Zone 9a, such as Southern California, Florida, Texas, Louisiana, Arizona, and Georgia, fall under this category. These areas typically have subtropical climates that are perfect for plants that thrive in heat and do not require frost protection.
When to Seed Lemongrass in Zone 9a for a Bountiful Harvest
Growing Lemongrass in Zone 9a can be a rewarding experience when you know the right time to seed it. The key is to plant the seeds when the risk of frost has passed and the soil temperature is warm enough for Lemongrass to grow strong. Typically, this is in late spring, after the last frost, when the weather is ideal for growing this valuable plant.

To ensure a great harvest, make sure to focus on how and when you seed your Lemongrass. Essential points to remember are that Lemongrass thrives in warmer climates, and planting it at the right time will help you achieve the strong growth needed for a successful harvest. Understanding this timing is crucial, so you can get the most out of your Lemongrass planting efforts.
Effective Signs That It Is Time to Seed Lemongrass
When it comes to seeding Lemongrass, the right weather conditions are crucial. Watch for temperatures that are steadily warm and frost-free to ensure healthy growth. Ideal seeding times are when sunny days increase and the early morning chills and late evening chills start to fade. The moisture in the air and sunlight exposure also help. It’s important to understand the perfect time and conditions before planting to guarantee a bountiful harvest.
| Month | Weather Conditions | Average Temperature (°C) | For Lemongrass |
| March | Warming Up | 10°C – 21°C | Late March good |
| April | Spring | 13°C – 24°C | Ideal for planting |
| May | Warm Spring | 16°C – 27°C | Best time to plant |
| June | Hot Summer | 21°C – 32°C | Great for growth |
| July | Hot Summer | 24°C – 35°C | Good growth conditions |
| August | Hot Summer | 21°C – 35°C | Continued growth |
How to Grow Lemongrass? Step-By-Step Simple Guide
1-Select the Method of Planting and Adjust Time
When planting Lemongrass, you have exciting choices. There are three options available: Transplanting at Home, Sowing Direct Seeds in the Ground, or Outdoor Transplanting after buying seedlings. Each method requires you to adjust your timing accordingly to ensure success.
If you plan to transplant at home, start the process in late February or early March for a seamless transition. On the other hand, sowing seeds directly into the ground works best from mid-April to May. If you’re opting for purchasing seedlings from a nursery, this timeframe also applies to outdoor transplanting.
For a smooth process, make sure to select any method that fits your resources and expertise. Starting the timing early gives you more control over the complete process.
Personally, I’ve found that direct sowing saves time, but transplanting at home offers flexibility in creating the ideal growing environment. The key is to match your gardening goals with the best approach while keeping track of essential dates.
Timing is the Same for Direct Planting; Which Should I Choose?
When the timing for both transplanting and direct planting aligns, the decision comes down to your personal goals and preferences. If the indoor period of late February to early March has passed, you can still grow Lemongrass by choosing the method of buying seedlings from a nursery and planting them outdoors. This option ensures you start with healthy plants, saving you time and effort.
On the other hand, if you prefer a consistent, natural environment and want to avoid the hassle of transplanting, sowing new seeds directly into the ground or pots may be more beneficial. Both methods offer benefits, but your choice depends on how much time and care you can provide and what you aim to achieve.
Steps For Transplanting➔Indoor Seedlings

1-Choose the Soil for Indoor Seedlings
For indoor seedlings, using a lightweight and nutrient-rich potting mix is essential. This type of soil allows young roots to grow smoothly without obstruction. If you prefer using garden soil, mix it with a bit of fertile sand. This adjustment helps to improve drainage and prevent compaction, ensuring the plants have the right conditions to thrive.
A potting mix is highly recommended for container gardening because it provides instant nutrients needed for plants to grow quickly. On the other hand, garden soil releases nutrients more slowly, which is beneficial for certain setups. Whether you opt for a potting mix or enhance garden soil, both methods can support healthy seedlings when chosen and prepared carefully.
2-Sterilize Your Soil (Optional but Helps to Prevent Pests or Disease)
Sterilizing soil is an optional step, but it can make a big difference in keeping your indoor seedlings healthy. By baking the soil at 180°F for about half an hour, you can reduce the chance of unwanted pests or diseases affecting your young plants. This method is simple and ensures a clean growing medium.
If you’re new to this, take some time to learn how to properly serialize your soil. It’s a proactive step that not only safeguards your plants but also promotes healthier growth. While it’s not mandatory, it’s worth considering for optimal results.
3-Opt a Clean Container (Small Pots or Seed Trays)
When starting your seedlings, it’s important to take a container that fits their needs, whether small pots or seed trays. Always ensure the container has proper drainage holes to prevent water from collecting at the bottom, which can lead to buildup or rotting. Keeping the container clean is also vital to prevent harmful issues that could impact your plants’ success.
A successful setup involves double-checking that your pots or trays are free from debris and sanitized. This extra step ensures your young plants have a safe environment to thrive. Make sure the containers are sturdy enough to support the growing roots while maintaining adequate drainage for a healthy start.
4-Fill the Pots with the Potting Mix
To transplant your indoor seedlings, you first need to fill your pots or seed trays with potting soil. It’s important not to overfill; leave some space at the top so that the soil remains level. Gently press down the soil, making sure it’s firm but not compacted.
This helps to create a stable base for your seedlings while still allowing the roots to spread easily as they grow. Don’t press too hard; you want to ensure that the roots can move freely without any restriction. Make sure the pots or seed trays are filled full enough to support your seedlings as they continue to grow.
5-Sow Lemongrass Seeds
When planting lemongrass seeds, it’s important to create enough space for each one to grow properly. Begin by filling a tray with soil and make sure it’s leveled. Plant the seeds around 1/4 inch deep in the soil. Leave at least an inch of space between each seed to ensure they don’t crowd each other as they sprout. If you’re planting multiple seeds, this spacing will help them grow strong and healthy, without competing for nutrients or light.
6-Moisten the Soil with Water Through a Spray Bottle
To encourage healthy seedling growth, it’s essential to moisten the soil. A spray bottle is a perfect tool for this, as it allows you to lightly dampen the soil without making it too soggy. When you use the spray, make sure you create the best environment for the seeds to start sprouting.
It’s important to spray just enough water to dampen the soil and avoid soaking it, as too much moisture could harm the seedlings. This method ensures the soil stays moist enough to promote growth while maintaining a well-balanced environment.
7-Cover the Soil with Plastic Wrap
After sowing the seedlings one by one in the prepared rows, it’s a good idea to create a moist environment to encourage proper growth. You can do this by covering the soil with plastic wrap.
This helps keep the soil moist and provides the warmth necessary for the seedlings to grow strong. It’s important to not allow the soil to dry out, so check the wrap regularly to make sure it stays in place, helping to maintain the moisture without making it too soggy.
The plastic wrap creates a mini-greenhouse effect, which is beneficial when trying to keep your seedlings healthy and strong. As the seedlings grow, be sure to water carefully, making sure the wrap doesn’t trap too much water, which could lead to overwatering. If this is done right, your seedlings will be in the perfect environment to flourish.
8-Keep the Seedling Container in a Warm Spot
After planting your seeds in the pots, it’s important to find the right spot for the seedlings to grow. Keep the container in a warm, sunny place to promote strong growth. A warm spot helps the soil remain moist, creating the best environment for the roots to establish themselves.
You should also press the soil down softly to remove any air pockets that might prevent proper growth. By doing this, you give the seedling the space and conditions it needs to grow strong and healthy. If you’re planting lemongrass, make sure to sow the seeds about 1/4 inch deep and space them 12 inches apart in well-prepared soil. Keep a close eye on their progress, and they should thrive in the warmth.
9-Watch the Shoots and Thin the Seedlings
As your seedlings grow, it’s important to keep an eye on their shoots. If they are growing too close together, it’s time to thin them out. This means carefully removing some seedlings to allow the remaining ones to grow stronger and healthier. Thinning helps ensure that each plant gets enough space and nutrients.
If you notice that the seedlings are struggling or becoming overcrowded, gently pull out the weaker ones. By doing so, you promote better air circulation and prevent the growth of mold or disease. Keep the soil around the seedlings moist but not soggy, and remember to keep the temperature stable. This way, you’re creating the best possible environment for your transplanted plants to thrive.
10-End Indoor Seedlings with Hardening-off
Before moving your seedlings outdoors, it’s important to start hardening off to help them adjust to the new environment. Begin this process about 20 days before the planned outdoor move, ideally around early March.
Place the seedlings outside for a few hours each day, gradually increasing the length of time they spend outdoors. Over the course of 1 to 2 weeks, slowly increase their stay outside, allowing them to adapt to different temperatures and conditions. This ensures your seedlings are ready for the full transition to the outdoors.
By moving outdoors gradually and giving them proper time to adjust, your seedlings will be much stronger and better prepared to thrive in their new environment. Make sure to monitor them closely, increasing the exposure slowly to avoid any stress or damage to the plants.
See Also: How to Grow Plants Along a Vinyl Fence: Step-by-Step Guide
Steps for Outdoor Transplanting and Direct Planting: Whether Using Your Indoor Seedlings or Purchased from a Nursery
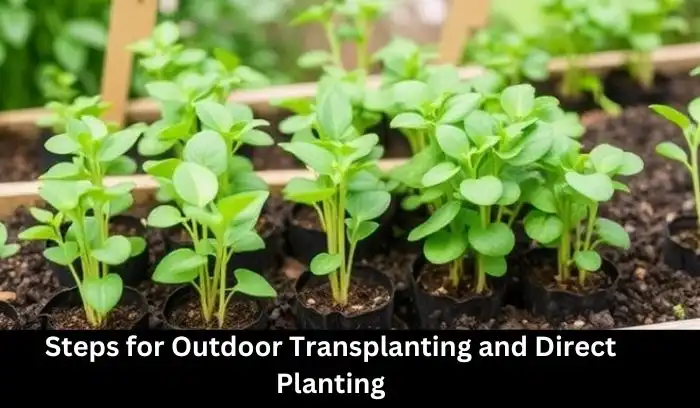
When you start the outdoor transplanting process, it’s important to give your seedlings time to adjust to their new environment. If you’ve purchased seedlings from a nursery, it’s best to harden them for 4 to 5 days. The climate of both your home and the nursery will influence how long this hardening process takes.
You should always keep a close eye on the seedlings and adjust the timing based on how they respond. The method for transplanting or direct planting of seeds involves preparing the area carefully.
Preparation is key, whether you’re planting purchased seedlings or sowing seeds directly into the soil. With the right care, your planting will be successful. The steps may vary slightly depending on whether you’re transplanting seedlings or planting seeds, but the overall process and steps work well for both.
1 – Look for a Sunny Location
When choosing the best place for your Lemongrass, look for a sunny spot that will receive direct sunlight for at least 6-8 hours each day. This guarantees that the plant gets the warmth it requires to grow and thrive.
Also, it’s essential that your chosen site has good drainage to prevent water accumulation, which could damage the roots. Always avoid areas where water tends to collect, as this could lead to root rot and hinder the growth of your Lemongrass.
Having the right environment is key, and the combination of sunlight and proper drainage will help your plant grow strong and healthy.
2-Empty the Area by Removing Weeds or Rocks
Before you start transplanting your Lemongrass, it’s important to clean the selected place where you’ll be working. This means removing any weeds, rocks, or debris that may be in the way.
These unwanted elements can hinder the growth of your new plants. Take time to ensure the area is neat and prepared for the next steps. A clear space will give your Lemongrass the best chance to thrive once planted.
By eliminating these obstacles, you create a better environment for transplanting. It’s an easy yet essential step in the process, ensuring that your seedlings or purchased plants have enough room to grow and establish themselves.
3-Loosen the Soil with a Garden Fork
Before transplanting your indoor seedlings or those you purchased from a nursery, it’s essential to loosen the soil. This process helps the roots penetrate the earth more easily, allowing the plants to establish themselves quickly.
Begin by gently fluffing the top layer of soil with a garden fork or tiller, which should be about 8 to inch deep. This will not only break up compacted soil but also improve drainage and aeration, making it easier for your plant’s roots to spread and grow.
I’ve found that loosening the soil properly makes a huge difference in the success of my transplants. The improved drainage prevents waterlogging, while the increased aeration helps the roots get the oxygen they need. A simple step like this ensures that your plants settle in well, even if they are transplanted during the early stages of growth or after being purchased from a nursery.
4-Mix Compost to Add Nutrient
To ensure your plants thrive, mixing compost into the soil is a crucial step. Adding 2 to 3 inches of well-decomposed manure or compost will enrich the soil with essential nutrients, which is key for healthy plant growth.
These nutrients help plants establish strong roots and grow vigorously. Spread the compost evenly over the soil and gently mix to integrate the nutrients.
In my experience, this step makes a noticeable difference in the health of the plants. The soil becomes richer, and the plants grow faster and stronger. I’ve also found that a good mixture of compost not only improves the soil but also enhances the texture, making it easier for roots to penetrate. This will give your plants the best start, whether they are indoor seedlings or purchased from a nursery.
5-Check the Soil pH
Before you start transplanting, it’s important to determine the soil acidity. You can do this by measuring the pH of your soil. Most plants, including lemongrass, prefer slightly acidic to neutral soil with a pH between 6.0 and 7.0.
If your soil’s pH is off, you can adjust it by adding lime (which raises the pH) or sulfur (which lowers it). This step ensures that the nutrients in the soil are available to the plant, helping it grow strong and healthy.
In my own experience, checking the soil pH has been a game changer. I once struggled with poor growth until I realized the pH was too high for my plants. After adjusting it with calcium carbonate or sulfur, the growth significantly improved. The right pH makes a huge difference in plant health and yields a better harvest, whether you’re using indoor seedlings or plants bought from a nursery.
6-Give Lightly Water
When you’re getting ready to transplant your indoor seedlings or plants purchased from a nursery, one important step is to moisten the soil before planting. This ensures that your seedlings won’t experience too much shock when placed outdoors.
Lightly water the soil to create a welcoming environment for them. It’s important to water just enough—not too much, but enough to keep the soil moist and prevent it from being dry. This small step will help protect your plants during the transplant process and support their growth.
The goal is to dig-in your seedlings gently into the soil without overwhelming them with too much water or stress. With direct planting, this is just as crucial since it allows the plants to settle into their new outdoor environment without shock. Whether you’re using your own indoor seedlings or plants from a nursery, this moistening step will ensure the planting process goes smoothly. Giving them that extra care before planting will help them thrive in their new home.
7-Dig Holes for Transplant and Direct Planting
When preparing for outdoor transplanting or direct planting, it’s crucial to first dig holes in the soil. These holes should be deep enough to accommodate your seedlings, whether they are from your indoor setup or purchased from a nursery. The key is to ensure the holes are spaced slightly apart in straight rows to allow for proper growth. Watering the soil before digging the holes can help moisten it, making the process easier and protecting your seedlings from shock.
After you’ve dug the holes, it’s time to sow your seedlings one by one into the holes. This method helps keep your plants organized and ensures they have room to grow. Planting in straight rows also makes maintenance easier. Whether you’re transplanting or direct planting, this method ensures that the plants have the best start in their new outdoor environment.
8-Get Seedlings in the Ground
After you’ve prepared the soil and selected your seedlings, it’s time to get them into the ground. Gently remove the seedlings from their pots, making sure not to damage the delicate roots. Place them carefully into the hole you’ve dug, ensuring they have enough space to grow.
Fill the hole with soil around the roots and press it down softly to avoid creating any air pockets. For direct planting, if you’re sowing lemongrass or other seeds, make sure they’re planted about 1/4 inch deep in well-prepared, moist soil. To ensure optimal growth, space them about 12 inches apart. This method helps ensure your plants get a good start in their new outdoor environment.
When planting, whether you’re transplanting or sowing seeds, it’s crucial to ensure the soil stays moist and well-maintained. Spaced correctly and in deep enough soil, your seedlings will thrive. To reduce root stress, keep the soil regularly moist but not saturated. This careful process helps your plants grow strong and healthy, whether you’re working with indoor seedlings or those you’ve purchased from a nursery.
9-Add a Mulch Layer Around the Plants
After you’ve transplanted your seedlings, it’s important to add a layer of mulch around each plant’s base. This helps retain moisture in the soil and keeps the plants hydrated, especially during dry spells.
The mulch also works to prevent the growth of weeds, which compete for nutrients. By maintaining this mulch layer, you can help the plants thrive by ensuring an even soil temperature, protecting the roots from extreme heat or cold, and keeping the soil moist.
I’ve found that adding mulch around newly transplanted seedlings has made a big difference in their growth. It’s a simple, yet effective step to maintain the health of your plants. With this technique, your plants will stay healthier and more resilient, even in challenging weather conditions.
How to Care for Lemongrass Plants During Growth
Caring for lemongrass requires attention to the right balance of water and moist soil. Lemongrass thrives in warm weather and needs consistent watering to maintain moisture.

However, be cautious not to drown the plant, as too much water can result in soggy soil. It’s important to monitor the soil moisture, ensuring it’s not overly saturated. By consistently giving the plant the proper care, you will help it grow strong and healthy.
For optimal growth, maintain a steady watering routine without overdoing it. Keeping the soil moist, but not waterlogged, will allow your lemongrass plant to flourish in warm weather conditions.
Sunlight & Fertilizing
When growing Lemongrass, it’s important to provide it with plenty of sunlight. The plant needs 6 to 8 hours of direct light every day to thrive. Without enough sunlight, your Lemongrass may not grow properly. When it comes to feeding, consider using a balanced fertilizer every 4 to 6 weeks to help it grow strong and healthy.
Choose organic and natural fertilizers, such as compost or fish emulsion. These are great options that provide essential nutrients without harming the environment. Before applying any fertilizer, always read the instructions on the package to make sure you’re using the correct amount. Feeding your plant with the right nutrients is a key factor in its success during growth.
Common Pests and Diseases
Lemongrass is generally a healthy plant but can sometimes face a few pests like aphids and spider mites. If you notice them, simply rinse your plant with water or use a gentle soap solution to remove them.
It’s important to keep the plant in a well-ventilated area with good air circulation to prevent fungal issues. Overwatering can lead to problems, so be careful and avoid it. Additionally, watch out for termites in your garden and take action promptly if you spot any. The key is to keep the plant healthy and address issues before they become serious.
Pruning
To keep your lemongrass plant looking fresh and healthy, it’s important to prune it regularly. Trim off any brown or damaged leaves to help the plant maintain a clean and vibrant appearance in your garden.
This simple step will also encourage better growth and ensure that the plant has enough energy to thrive. Don’t hesitate to snip away leaves, but always leave enough behind for the best results. You can use the fresh leaves for cooking, while still allowing the plant to grow strong and healthy.
Pruning is an easy way to improve the overall health of your lemongrass plant, so be sure to do it regularly for the best outcome. By removing old or unhealthy leaves, you allow your lemongrass to direct more resources to the new, healthy greenery.
Temperature and Weather
When growing lemongrass, the perfect conditions are found in Zone 9a, where the weather is typically warm. Lemongrass thrives best between 60°F and 85°F, so it’s important to monitor your plants closely. If the temperature drops and it gets too chilly, take action to protect them.
If you notice a sudden climate change or frost is likely, consider covering your plants or bringing potted ones indoors to keep them safe and prevent frost damage. With a little attention, your lemongrass can grow strong and healthy even in changing conditions.
Harvesting Time
When your lemongrass reaches a height of at least 12 inches and the stalks are thick, it’s the perfect time for harvesting. Use a sharp tool to cut the stalks at the base. Be sure to leave enough leaves so the plant can keep growing.
After cutting, you can wrap the stalks in a damp paper towel to keep them fresh. Keep them in the refrigerator for up to two weeks. For longer storage, slice the stalks and freeze them in a sealed container. This way, you’ll have fresh lemongrass available whenever you need it!
Caring for Lemongrass in Pots
When growing lemongrass in pots, it’s important to pay attention to its needs for watering. Make sure to water the plant regularly, especially during hot and dry periods, but avoid overwatering as lemongrass prefers moist soil that is not waterlogged.
To prevent root rot, make sure the pot has appropriate drainage holes. During the growing periods, you can help your plant thrive by fertilizing it with a balanced, water-soluble fertilizer every 2–3 months, or a high nitrogen fertilizer once a month. If you’re in a dry climate, consider mist the plant to maintain the required humidity and keep it healthy.
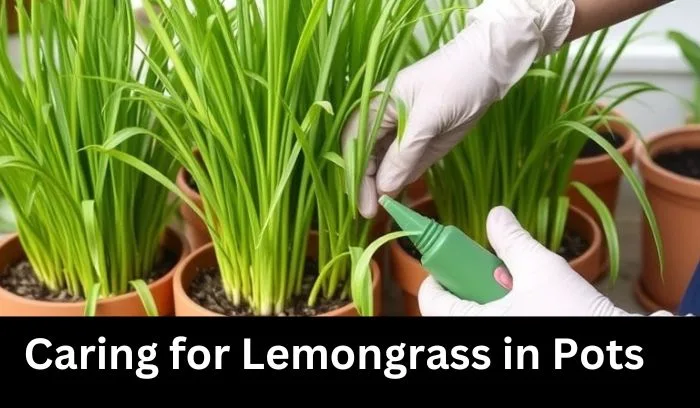
It’s crucial to provide the right temperature for lemongrass, which thrives in warm temperatures between 21–29°C and requires higher humidity. Avoid repotting your plant in the winter or summer as it could cause stress.
If you plan on moving your container-planted lemongrass indoors for winter protection, be sure to bring it inside before the temperatures drop too low. For better growth, apply mulching around the base of the plant to help retain moisture and suppress weeds. Harvesting should be done when the stalks are 1/2 inch thick—simply cut the lower part of the stalk, leaving the white part for cooking.
When to seed lemongrass in zone 9a in winter
In zone 9a, the best time to seed lemongrass is indoors, starting three weeks before the last frost. You should sow seeds in flats when nighttime temperatures are consistently above 60°F.
This helps avoid the danger of planting too early and ensures that the lemongrass will grow well once it’s ready to move outside. Lemongrass thrives in growing zones 9a to 11b, where it can stay green throughout the year. Knowing the frost dates is crucial to ensure that the plant is safe from any unexpected cold snaps.
Once it’s time to plant, ensure the soil is rich, well-drained, and has a pH between 6.5 and 7.0. Water the top inch of soil regularly, especially when it becomes dry, but don’t let it stay waterlogged.
You can fertilize every couple of weeks during the growing season, using a nitrogen-rich fertilizer like compost tea. If you’re in cold regions, overwintering is an option. Simply dig up some stalks, trim them, and transfer them to smaller pots to keep them indoors until the warmer months.
How to grow lemongrass from stalk
To grow lemongrass from a stalk, start by cutting the base of a fresh stalk and removing any woody parts. Place the cut end in a glass filled with lukewarm water, ensuring the stalk is in a warm, sunny spot with enough sunlight. Change the water regularly to prevent bacteria growth and encourage healthy roots to develop. After a couple of weeks, you will start to see roots forming. Once the roots are established, it’s time to plant the stalk in a pot with well-draining soil.
Choose a healthy stalk and prepare it by trimming any dry or woody parts using a sharp knife, exposing fresh tissue. Keep the pot in a warm and sunny location to promote further growth.
Make sure the soil remains moist, but avoid it becoming soggy. Continue to monitor the plant, and once it’s well-established, you can continue to care for it by ensuring it gets the right amount of sunlight and moisture.
Troubleshooting Common Problems in Lemongrass Growth
If you’re noticing brown leaves on your lemongrass, it could be due to overwatering or underwatering. Root rot often follows overwatering, so check your watering schedule and make sure the plant is in a location with good airflow. If it’s outside, try bringing it indoors to recover.
On the other hand, underwatering can also cause issues, so ensure the soil’s moisture levels are balanced. If your lemongrass is in poor drainage like clay soil, it could lead to problems like rust or powdery mildew. Adjust the soil to be more well-draining and add organic fungicide if necessary.
Pests, mold, and root rot can also affect your lemongrass. To manage these, try using neem oil and soil management techniques. Ensure the plant gets the right amount of light and is in an environment with a temperature range between 64°F and 86°F, with indirect sunlight. Additionally, the humidity should be right, and ensure that droopy leaves are not a sign of poor humidity or improper watering.
RAQS
The best time to plant lemongrass is in spring, once all chances of frost have passed. Lemongrass loves hot weather and requires full sun to grow well. It thrives in fertile, well-drained soil with a pH of 6.5 to 7.0. Whether you’re planting in the ground or containers, make sure the soil is well-drained for healthy growth.
For the best results, plant in an area with plenty of sunlight. I’ve found that giving lemongrass the right conditions, especially warmth, helps it grow quickly and beautifully.
Lemongrass cannot survive temperatures below 32°F (0°C). It thrives in hot conditions but is sensitive to cold and frost. Freezing temperatures can kill the plant, so make sure to plant it after the last frost in spring. In colder areas, it’s best to grow lemongrass in containers, allowing you to bring it indoors when the temperature drops.
Lemongrass prefers a full sun spot but can tolerate areas that receive sunlight for half the day. In warmer, drier weather, it will need regular watering. Applying open, organic mulch around the plant helps retain moisture and suppress weeds. From my experience, more sun leads to better growth. Even with less sun, lemongrass will survive, but it thrives with plenty of light.
Lemongrass typically has an economical lifespan of 4 years and can grow up to 1.8 m (about 6 ft) in height. Known as ginger grass or citronella grass, it originates from Sri Lanka and Malaysia. The wild form is not widely known, but it’s a popular plant in many gardens.
From my experience, lemongrass grows quickly and remains productive for a few years, though its output may decrease after about 4 years.
Lemon grass, or fever grass, is a perennial plant with thin, long leaves and is indigenous to many Asian countries. It contains citral, an essential oil known for its medicinal and useful properties. Both names refer to the same plant, which has significant therapeutic significance in various cultures.
In my experience, the terms lemongrass and fever grass are used interchangeably depending on the region, though the plant’s health benefits remain the same.
Lemongrass can cause gastrointestinal spasms, stomachache, and vomiting when taken orally. It may also lead to hypertension, convulsions, pain, and neuralgia. Other side effects include cough, rheumatism, fever, common cold, and exhaustion.
Topically, it can cause headache, abdominal pain, and musculoskeletal pain. It’s important to use lemongrass in moderation to avoid these side effects.
Summary
Growing lemongrass in Zone 9a can be challenging, especially for new gardeners. Timing is key—plant in early spring when the weather is warm but not too hot. Lemongrass thrives in tropical environments and struggles with cooler climates. In Zone 9a, the mild winter and occasional cold spells make it harder for lemongrass to grow without stress, so wait for the last frost to pass before planting.
Lemongrass is a versatile perennial with numerous health benefits, including digestive aid, stress relief, and immune system support. Understanding Zone 9a’s climate, with temperatures ranging from -6°C to -3°C, helps ensure the plant thrives when planted at the right time.